- Policies and Profiles Guide
- Policies
- Control Policies
- Compliance Policies
- Creating a Compliance Policy
- Creating a Compliance Condition to Check Host File Contents
- Checking for Compliance
- Scheduling a Compliance Check
- Checking a Virtual Machine for Compliance from the Summary Screen
- Checking a Host for Compliance from the Summary Screen
- Checking a Replicator for Compliance from the Summary Screen
- Checking a Pod for Compliance from the Summary Screen
- Checking a Container Node for Compliance from the Summary Screen
- Checking a Container Image for Compliance from the Summary Screen
- Conditions
- Actions
- Custom Actions
- Creating an Assign Profile to Analysis Task Action
- Creating a Snapshot Action
- Deleting Snapshots by Age
- Evaluating an Alert
- Creating an Inherit Tag Action
- Creating a CPU Reconfigure Action
- Creating a Memory Reconfigure Action
- Creating a Remove Tag Action
- Creating an Ansible Playbook Run Action
- Creating an E-mail Action
- Creating an SNMP Action
- Creating a Set Custom Attribute Action
- Creating a Tag Action
- Editing an Action
- Deleting an Action
- Custom Actions
- Policy Profiles
- Creating Policy Profiles
- Deleting a Policy Profile
- Simulating Policy
- Assigning Policy Profiles
- Assigning Policy Profiles to an Infrastructure Provider
- Removing Policy Profiles from an Infrastructure Provider
- Assigning Policy Profiles to a Cluster
- Removing Policy Profiles from a Cluster
- Assigning Policy Profiles to a Host
- Removing Policy Profiles from a Host
- Assigning Policy Profiles to a Virtual Machine
- Removing Policy Profiles from a Virtual Machine
- Assigning Policy Profiles to a Resource Pool
- Removing Policy Profiles from a Resource Pool
- Assigning Policy Profiles to a Cloud Provider
- Removing Policy Profiles from a Cloud Provider
- Assigning Policy Profiles to a Network Provider
- Removing Policy Profiles from a Network Provider
- Assigning Policy Profiles to a Container Provider
- Removing Policy Profiles from a Container Provider
- Assigning Policy Profiles to a Replicator
- Removing Policy Profiles from a Replicator
- Assigning Policy Profiles to a Pod
- Removing Policy Profiles from a Pod
- Assigning Policy Profiles to a Container Node
- Removing Policy Profiles from a Container Node
- Assigning Policy Profiles to a Container Image
- Removing Policy Profiles from a Container Image
- Assigning Policy Profiles to an Instance
- Removing Policy Profiles from an Instance
- Disabling a Policy in a Policy Profile
- Viewing Policy Simulation - Resultant Set of Policy (RSOP)
- Exporting and Importing Analysis Profiles
- Policies
- Appendix
- Events
Policies and Profiles Guide
Policies
Policies are used to manage your virtual environment. There are two types of policies available: compliance and control. Compliance policies are used to harden your virtual infrastructure, making sure that your security requirements are adhered to. Control policies are used to check for a specific condition and perform an action based on the outcome. For example:
-
Prevent virtual machines from running without an administrator account.
-
Prevent virtual machines from starting if certain patches are not applied.
-
Configure the behavior of a production virtual machine to only start if it is running on a production host.
-
Force a SmartState Analysis when a host is added or removed from a cluster.
Control Policies
A control policy is a combination of an event, a condition, and an action. This combination provides management capabilities in your virtual environment.
-
An event is a trigger to check a condition.
-
A condition is a test that is triggered by an event.
-
An action is an execution that occurs if a condition is met.
Creating Control Policies
Create control policies by combining an event, a condition, and an action. Plan carefully the purpose of your policy before you create the policy. You can also use a scope expression that is tested immediately when the policy is triggered by an event. If the item is out of scope, then the policy does not continue on to the conditions, and none of the associated actions run.
This procedure describes how to create a control policy, its underlying conditions, and assign its events and actions in one process. Conditions and custom actions can be created separately as well. Those procedures are described in later sections in conditions and actions. Also, a description of all events is provided in events.
-
Browse to menu: Control > Explorer.
-
Click the Policies accordion, and select Control Policies.
-
Select either Host Control Policies or VM Control Policies or Replicator Control Policies or Pod Control Policies or Container Node Control Policies or Container Image Control Policies.
-
Click
 Configuration,
  Add a New Host / VM / Replicator / Pod / Node / Image Control Policy.
 -
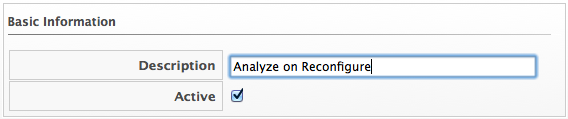
Type in a Description.
-
Uncheck Active if you do not want this policy to be processed even when assigned to a resource.
-
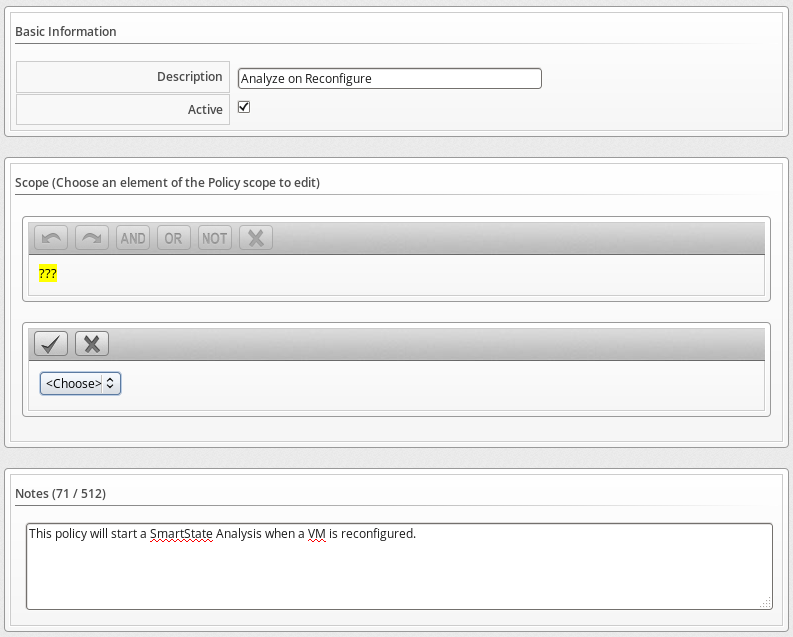
You can enter a Scope here (You can also create a scope as part of a condition, or not use one at all). If the host or virtual machine is not included in the scope, no actions are run.
-
In the Notes area, add a detailed explanation of the policy.
-
Click Add. You are brought to the page where you add conditions and events to your new policy.
-
Click
Configuration to associate conditions, events, and actions with the policy.
Editing Basic Information, Scope, and Notes for a Policy
As your enterprise’s needs change, you can change the name of a policy or its scope. If the items that are being evaluated are out of scope, policy processing stops and no actions run.
-
Browse to menu: Control > Explorer.
-
Click the Policies accordion, and select the policy to edit.
-
Click
Configuration,  Edit Basic Info, Scope, and Notes.
 -
In the Scope area, create a general condition based on a simple attribute. Or, click an existing expression to edit it. Based on what you choose, different options appear. Configuring a Scope is optional for a policy.
-
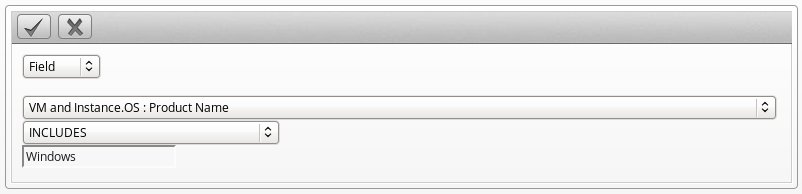
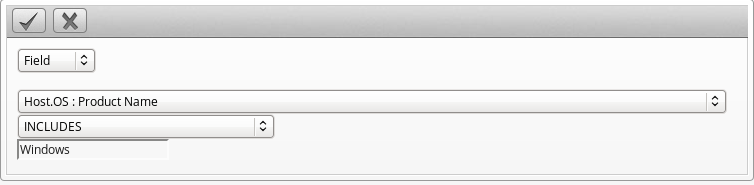
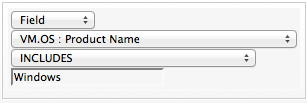
Click Field to create criteria based on field values.

-
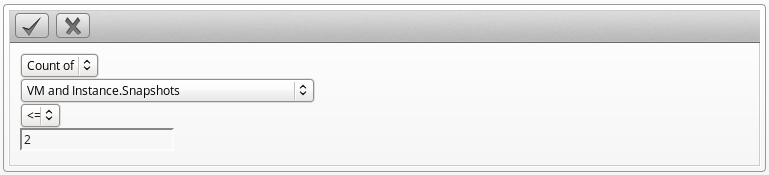
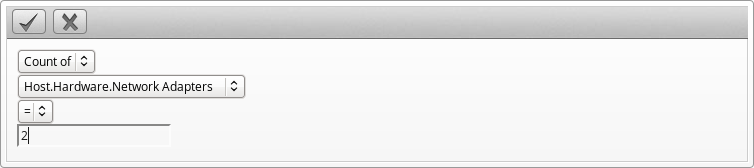
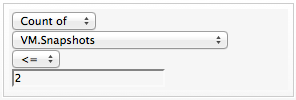
Click Count of to create criteria based on the count of something, such as the number of snapshots for a virtual machine, or the number of virtual machines on a host.
-
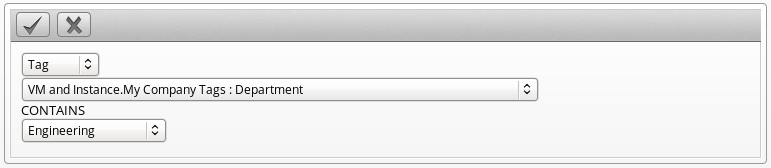
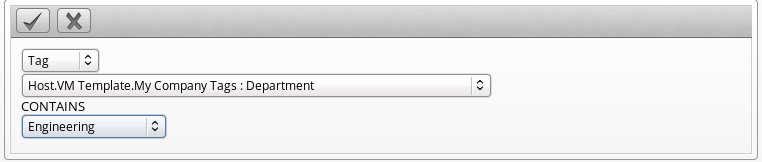
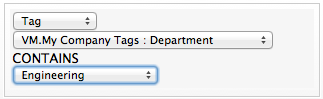
Click Tag to create criteria based on tags that are assigned to your resources. For example, you can check the power state of a virtual machine or see whether it is tagged as production.

-
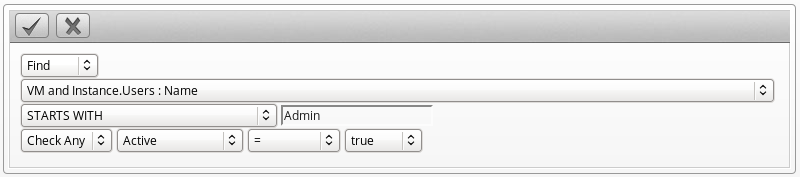
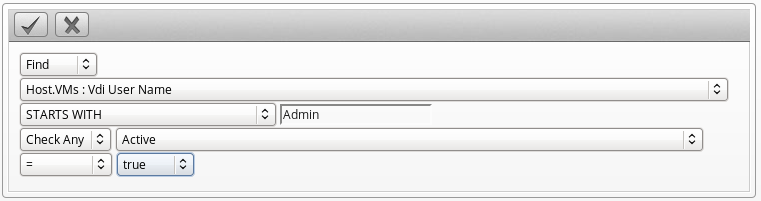
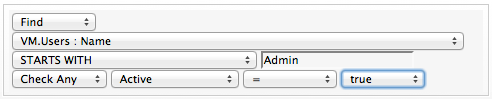
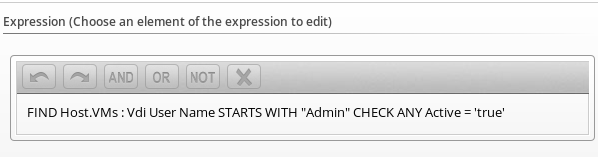
Click Find to seek a particular value, and then check a property. For example, finding the Admin account and checking that it is enabled. Use the following check commands:
-
Check Any: The result is true if one or more of the find results satisfy the check condition.
-
Check All: All of the find results must match for a true result.
-
Check Count: If the result satisfies the expression in check count, the result is true.
-
-
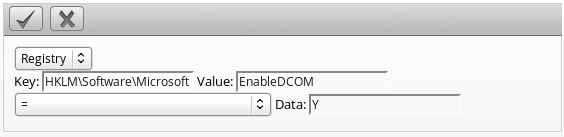
Click Registry to create criteria based on registry values. For example, you can check whether DCOM is enabled on a Windows System. Note that this applies only to Windows operating systems. Registry will only be available if you are editing a VM Control Policy.

-
-
Click
 Commit Expression Element Changes to add the scope.
 -
In the Notes area, make the required changes.
-
Click Save.
Copying a Policy
You can copy a policy if its contents are similar to a new one that you want to create, then change the condition or event associated with it. This enables you to make new policies efficiently.
-
Navigate to menu: Control > Explorer.
-
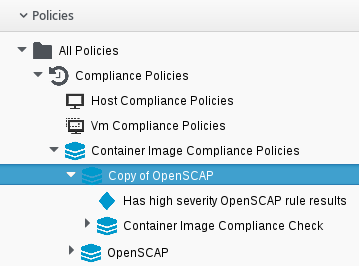
Click the Policies accordion, and select the policy that you want to copy.
-
Click
Configuration, and an option to copy the policy appears; for example,  Copy this Image Policy.
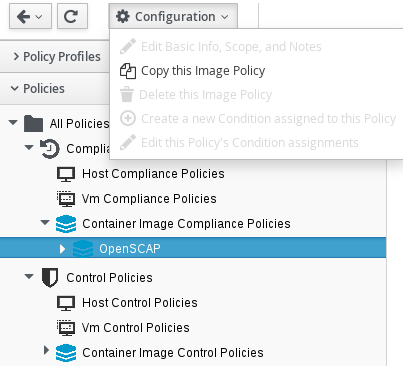
-
Click OK to confirm.
The new policy is created with a prefix of Copy of in its description, and it can be viewed in the Policy accordion.
Deleting a Policy
You can remove policies that you no longer need. You can remove only the policies that aren’t assigned to a policy profile.
-
Browse to menu: Control > Explorer.
-
Click the Policies accordion, and select the policy that you want to remove.
-
Click
Configuration,  Delete this Host/VM and Instance/Replicator/Pod/Node/Image Policy.
 -
Click OK to confirm.
Creating a New Policy Condition
If you have not created a condition to use with this policy, you can create one directly from inside the policy. A condition can contain two elements: a scope, and an expression. The expression is mandatory, but the scope is optional. A scope is a general attribute that is quickly checked before evaluating a more complex expression. You can create a scope at either the policy or condition level.
-
Browse to menu: Control > Explorer.
-
Click the Policies accordion, and select the policy that you want to create a new condition for.
-
Click
Configuration, Create a new Condition assigned to this Policy. -
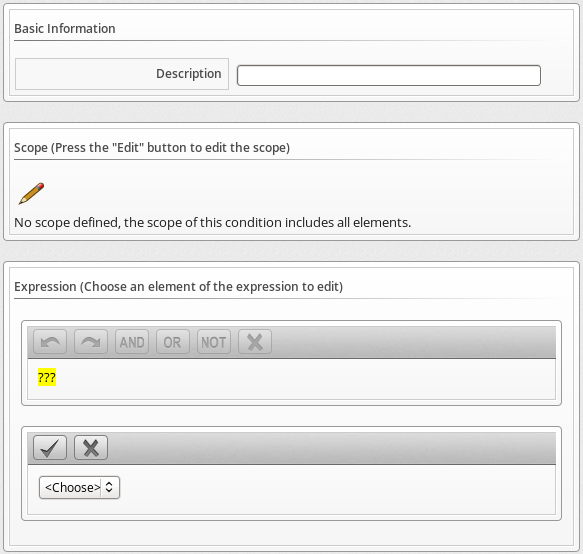
Type in a Description for the condition. It must be unique to all the conditions.
-
Click
Edit this Scope in the Scope area to create a general expression based on a simple attribute, such as operating system version. Based on what you choose, different options display. Scope is optional.-
Click Field to create criteria based on field values.
-
Click Count of to create criteria based on the count of something, such as the number of snapshots for a virtual machine, or the number of virtual machines on a host.

-
Click Tag to create criteria based on tags that are assigned to your resources. For example, you can check the power state of a virtual machine or see whether it is tagged as production.
-
Click Find to seek a particular value, and then check a property. For example, finding the Admin account and checking that it is enabled. Use the following check commands:
-
Check Any: The result is true if one or more of the find results satisfy the check condition.
-
Check All: All of the find results must match for a true result.
-
Check Count: If the result satisfies the expression in check count, the result is true.

-
-
Click Registry to create criteria based on registry values. For example, you can check whether DCOM is enabled on a Windows System. This applies only to Windows operating systems. Registry is only available if you are creating a VM Control Policy.

-
-
Click
Commit expression element changes to add the scope. -
Click
Edit this Expression in the Expression area. Based on what you choose, options display according to the choices that are presented in the Scope area. -
Click
Commit Expression Element Changes to add the expression. -
In Notes, type in a detailed explanation of the condition.
-
Click Add.
The condition is created and is assigned directly to the policy. Note: The condition can be assigned to other policies.
Editing Policy Condition Assignments
Use this procedure to use a condition that was created either separately or as part of another policy. You can also remove a condition from a policy that no longer applies.
-
Browse to menu: Control > Explorer.
-
Click the Policies accordion, and select the policy that you want to assign conditions to.
-
Click
Configuration, Edit this Policy’s Condition assignments. -
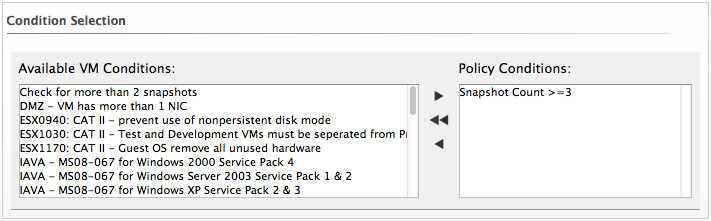
From the Condition Selection area, you can assign conditions to the policy, remove all conditions from the policy, or remove specific conditions from the policy.
-
To add one or several conditions, select all the conditions that you want to apply from the Available Conditions box. Use
Ctrlto add multiple conditions to a policy. Then, click Move selected Conditions into this Policy.
 -
Click
 Remove all Conditions from this Policy to unassign any conditions from this policy.
 -
To remove one or some conditions, select all the conditions that you want to remove from the Policy Conditions box. Use
Ctrlto select multiple conditions. Then, click Remove selected Conditions from this Policy.
-
-
Click Save.
Editing Policy Event Assignments
The policy evaluates its scopes and conditions when specified events occur in your virtual infrastructure. This procedure helps you to select those events and the actions that occur based on the evaluation of the scopes and conditions for the policy.
-
Browse to menu: Control > Explorer.
-
Click the Policies accordion and select the control policy that you want to assign events to.
-
Click
Configuration, Edit this Policy’s Event assignments. -
Check all the events that you want to assign to this policy.
-
Click Save.
Assigning an Action to an Event
This procedure describes how to assign an action to an event.
-
Browse to menu: Control > Explorer.
-
Click the Policies accordion, and select the policy that you want to assign actions to.
-
From the Events area, click the description of the event you want to assign an action to.
-
Click
Configuration, Edit Actions for this Policy Event. -
Select all the appropriate actions from the Available Actions box, inside the Order of Actions if ALL Conditions are True. These are the actions that take place if the resources meet the Condition of the Policy.
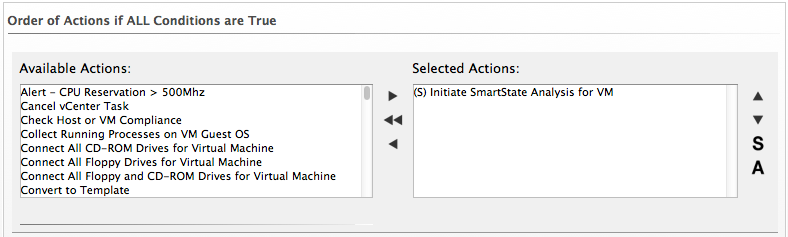
Note:
Each selected action can be executed synchronously or asynchronously; synchronous actions will not start until the previous synchronous action is completed, and asynchronous action allows the next action to start whether the first action has completed or not. Also, at least one ManageIQ server in the ManageIQ zone must have the notifier server role that is enabled for the trap to be sent.
-
Click the add button
, then:-
Click the action, then click
 Set selected Actions to Asynchronous to make it asynchronous.
 -
Click the action, then click
 Set selected Actions to Synchronous to make it synchronous. If creating a synchronous action, use the up and down arrows to identify in what order you want the actions to run.
-
-
Select all the actions from the appropriate Available Actions box, inside of the Order of Actions if ANY Conditions are False. These are the actions that take place if the resources do not meet the condition of the policy.
-
Click Save.
Compliance Policies
Compliance policies are designed to secure your environment by checking conditions that you create. These conditions can include the same conditions that you would use in a control policy, and most of the procedures are the same. However, a compliance policy automatically assigns the mark as a compliant action when the entity type (virtual machine or host, for example) to which the policy applies passes all of the conditions. If any of the conditions are not met, then the virtual machine or host is marked as non-compliant. The compliance status is shown in the summary screen for the entity type and on the compare and drift screens.
Creating a Compliance Policy
Create compliance policies by assigning or creating a condition. ManageIQ automatically assigns the events and actions to the compliance policy as opposed to a control policy where you must define this yourself. The entity type (VM or host, for example) compliance check event is assigned to the compliance policy. A compliance policy runs the mark as compliant action when the virtual machine or host passes all of the conditions. If any of the conditions are not met, then the virtual machine or host is marked as non-compliant.
Carefully plan the purpose of your policy before creating it. You can also use a scope expression that is tested immediately when the compliance check event triggers the policy. If the item is out of scope, then the policy does not continue on to the conditions, and none of the associated actions run.
-
Browse to menu: Control > Explorer.
-
Click the Policies accordion, and select Compliance Policies.
-
Select either Host Compliance Policies or VM Compliance Policies or Replicator Compliance Policies or Pod Compliance Policies or Container Node Compliance Policies or Container Image Compliance Policies.
-
Click
Configuration, Add a new Compliance Policy. -
Type in a Description for the policy.
-
Uncheck Active if you do not want this policy to be processed even when assigned to a resource.
-
You can enter a scope here. (You can also create a scope as part of a condition, or not use one at all.) If the host or virtual machine is not included in the scope, no actions run.
-
In the Notes area, add a detailed explanation of the policy.
-
Click Add.
You must add one or several conditions:
-
You can create a new condition by clicking
Configuration, Create a new Condition assigned to this Policy, as described in Creating a New Policy Condition. -
You can use an existing condition by clicking
Configuration, Edit this Policy’s Condition assignments, as described in Editing Policy Condition Assignments.
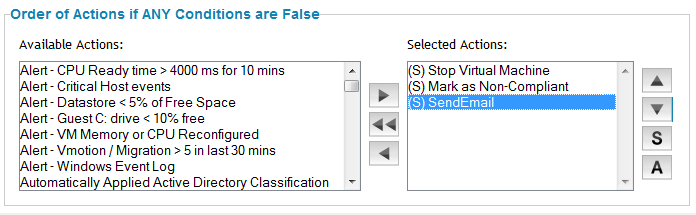
By default, if any of the conditions are false, the virtual machine is marked as non-compliant. To add other actions, such as sending an email if the virtual machine fails the compliance test:
-
Click the Compliance Check event under the policy (exact name depends on entity type, for example VM Compliance Check.
-
Click
Configuration, Edit Actions for this Policy Event. -
Select Stop Virtual Machine and Send Email from the Available Actions area in Order of Actions if ANY conditions are False. (Mark as Non-Compliant should already be selected.)
-
Click
Move selected Actions into this Event. -
Click Add.
You can now make this part of a policy profile. After assigning the policy profile to the virtual machine, you can check it for its compliance status either on a schedule or on demand.
Creating a Compliance Condition to Check Host File Contents
ManageIQ Control provides the ability to create a compliance condition that checks file contents. Use this to be sure that internal operating system settings meet your security criteria. Regular expressions are used to create the search pattern. Test your regular expressions thoroughly before using them in a production environment.
Note that to search file contents you need to have collected the file using a host analysis profile.
-
Browse to menu: Control > Explorer.
-
Click the Conditions accordion, and select Host Conditions.
-
Click
Configuration, Add a New Host Condition. -
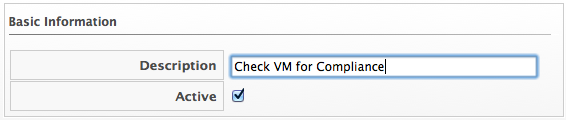
In Basic Information, type in a Description for the condition.

-
Editing the Scope area is not necessary for this procedure. Skip editing any Scope conditions.
-
If the Expression area is not automatically opened, click
Edit this Expression, then edit the condition area to create a general condition based on a simple attribute. Based on what you choose, different options appear.-
Click Find, then Host.Files : Name, and the parameters to select the file that you want to check.
-
Click Check Any, Contents, Regular Expression Matches, and type the expression. For example, if you want to make sure that permit root login is set to no, type
^\s*PermitRootLogin\s+no.
-
-
Click
Commit expression element changes to add the expression. -
In Notes area, type in a detailed explanation of the condition.
-
Click Add.
Checking for Compliance
After you have created your compliance policies and assigned them to a policy profile, you can check compliance in two ways. You can either schedule the compliance check or perform the check directly from the summary screen.
The compliance check runs all compliance policies that are assigned to the host or virtual machine. If the item fails any of the checks, it is marked as non-compliant in the item’s summary screen.
Note:
To schedule, you must have EvmRole-administrator access to the ManageIQ server.
Scheduling a Compliance Check
-
Click
 Configuration.
 -
Click the Settings accordion, and select Schedules.
-
Click
Configuration, Add a new Schedule. -
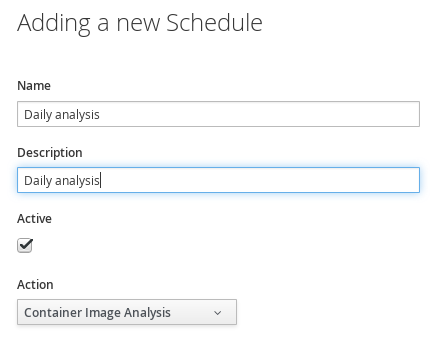
In the Adding a new Schedule area, type in a name and description for the schedule.
-
Select Active if you want to enable this scan.
-
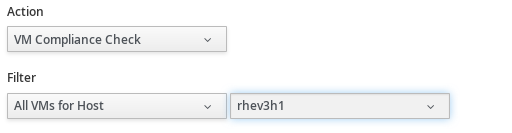
From the Action dropdown, select the type of compliance check you want to schedule. Depending on the type of analysis you choose, you are presented with one of the following group boxes:
-
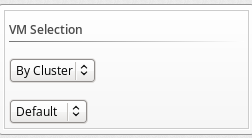
If you choose VM Compliance Check, you are presented with VM Selection where you can choose to check all VMs, all VMs for a specific provider, all VMs for a cluster, all VMs for a specific host, a single VM, or you can select VMs by using a global filter.
-
If you choose Host Compliance Check, you are presented with Host Selection where you can choose to analyze all hosts, all hosts for a specific provider, all hosts for a cluster, a single host, or you can select hosts by using a global filter.
-
If you choose Container Image Compliance Check, you are presented with Image Selection where you can choose to analyze all images, all images for a specific provider, or a single image.
-
Note:
You can schedule a host analysis only for connected virtual machines, not repository virtual machines that were discovered through that host. Since repository virtual machines do not retain a relationship with the host that discovered them, there is no current way to scan them through the scheduling feature. The host is shown because it might have connected virtual machines in the future when the schedule is set to run.
-
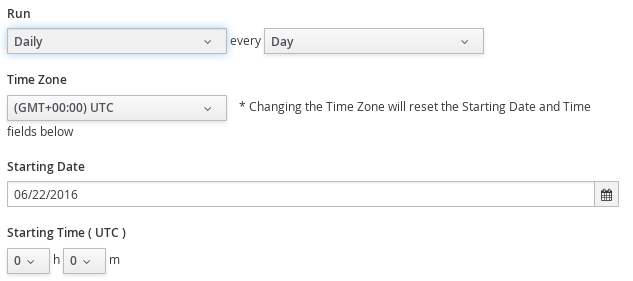
From the Run menu, select how often you want the analysis to run. Your options after that depend on which run option you choose.
-
Select Once to have the analysis run just one time.
-
Select Hourly to run the analysis hourly. You’re prompted to select how many hours you want between each analysis.
-
Select Daily to run the analysis daily. You’re prompted to select how many days you want between each analysis.
-
Select Weekly to run the analysis weekly. You’re prompted to select how many weeks you want between each analysis.
-
Select Monthly to run the analysis monthly. You’re prompted to select how many months you want between each analysis.
-
-
Select the time zone for the schedule.
-
Type or select a date to begin the schedule in Starting Date.
-
Select a starting time based on a 24-hour clock in the selected time zone.
-
Click Add.
Checking a Virtual Machine for Compliance from the Summary Screen
-
Browse to menu: Compute > Infrastructure > Virtual Machines, select the virtual machine that you want to check for compliance.
-
Click
 Policy, and then
  Check Compliance of Last Known Configuration.
 -
A confirmation message appears. Click OK.
-
To view the compliance history, click the virtual machine. Under Compliance, if History is Available, click it to see its compliance history.

Checking a Host for Compliance from the Summary Screen
-
Browse to menu: Compute > Infrastructure > Hosts, click the host that you want to check for compliance.
-
Click
Policy, and then Check Compliance of Last Known
Configuration or Analyze then Check Compliance. -
To view the compliance history, click Available next to History.

Checking a Replicator for Compliance from the Summary Screen
-
Browse to menu: Compute > Containers > Replicators, select the replicator that you want to check for compliance.
-
Click
Policy, and then Check Compliance of Last Known Configuration. -
A confirmation message appears. Click OK.
-
. To view the compliance history, click the replicator. Under Compliance, if History is Available, click to see its compliance history.
Checking a Pod for Compliance from the Summary Screen
-
Browse to menu: Compute > Containers > Pods, select the pod that you want to check for compliance.
-
Click
Policy, and then Check Compliance of Last Known
Configuration. -
A confirmation message appears. Click OK.
-
To view the compliance history, click the pod. Under Compliance, if History is Available, click to see its compliance history.
Checking a Container Node for Compliance from the Summary Screen
-
Browse to menu: Compute > Containers > Container Nodes**, click the node that you want to check for compliance.
-
Click
Policy, and then Check Compliance of Last Known
Configuration. -
A confirmation message appears. Click OK.
-
To view the compliance history, click the node. Under Compliance, if History is Available, click to see its compliance history.
Checking a Container Image for Compliance from the Summary Screen
-
Browse to menu: Compute > Infrastructure > Container Images, select the container image that you want to check for compliance.
-
Click
Policy, and then Check Compliance of Last Known
Configuration. -
A confirmation message appears. Click OK.
-
To view the compliance history, click the container image. Under Compliance, if History is Available, click to see its compliance history.
Conditions
Conditions are tests that are performed on attributes of virtual machines. A condition can contain two elements, a scope, and an expression. The expression is mandatory, but the scope is optional. A scope is a general attribute that is quickly checked before evaluating a more complex expression. For example, you might use a scope to check the operating system, and use an expression to check for a specific set of applications or security patches that only apply to the operating system referenced in the scope. If no conditions, scope, or expression, are defined for a policy, the policy is considered unconditional and returns a true value.
Creating a Condition
You can create a condition either from within a policy screen or by going directly to the expression editor in the ManageIQ console. You need to define a description and an expression element. The expression element defines what criteria you want to use to test the condition.
-
Browse to menu: Control > Explorer.
-
Click the Conditions accordion, and select either Host / Node Conditions or VM and Instance Conditions or Replicator Conditions or Pod or Node Conditions or Image Conditions.
-
Click
Configuration, then Add a New Host / VM / Replicator / Pod / Node / Image Condition. -
Enter a Description for the condition.

-
Click Edit this Scope in the Scope area to create a general condition based on a simple attribute. Based on what you choose, different options appear. Creating a scope is optional.

-
Click Field to create criteria based on field values.
-
Click Count of to create criteria based on the count of something, such as the number of network adapters on the host.
-
Click Tag to create criteria based on tags that are assigned to your resources. For example, you can check the power state of a virtual machine or see whether it is tagged as production.
-
Click Find to seek a particular value, and then check a property. For example, finding the Admin account and checking that it is enabled. Use the following check commands:
-
Check Any: The result is true if one or more of the find results satisfy the check condition.
-
Check All: All of the find results must match for a true result.
-
Check Count: If the result satisfies the expression in check count, the result is true.
-
-
Click Registry to create criteria based on registry values. For example, you can check whether DCOM is enabled on a Windows System. This applies only to Windows operating systems. Registry will only be available if you are creating a VM Condition.

-
-
Click
Commit expression element changes to add the scope. -
Click Edit this Expression in the Expression area to create a general condition based on a simple attribute. Based on what you choose, different options appear.
-
Click Field to create criteria based on field values.
-
Click Count of to create criteria based on the count of something, such as the number of snapshots for a virtual machine, or the number of virtual machines on a host.
-
Click Tag to create criteria based on tags assigned to your resources. For example, you can check the power state of a virtual machine or see whether it is tagged as production.
-
Click Find to seek a particular value, and then check a property. For example, finding the Admin account and checking that it is enabled. Use the following check commands.
-
Check Any: The result is true if one or more of the find results satisfy the check condition.
-
Check All: All of the find results must match for a true result.
-
Check Count: If the result satisfies the expression in check count, the result is true.
-
-
Click Registry to create criteria based on registry values. For example, you can check whether DCOM is enabled on a Windows System. This applies only to Windows operating systems.
-
-
Click
Commit expression element changes to add the expression. -
In Notes, type in a detailed explanation of the condition.
-
Click Add.
Editing a Condition
Edit a condition to add more expressions to it or modify its properties. You can edit conditions that you created.
-
Browse to menu: Control > Explorer.
-
Click the Conditions accordion, and click the condition that you want to edit.
-
Click
Configuration, Edit this Condition. -
Click in either the Scope or Expression area, and click the part of the condition to edit.
-
Make the edits for the current expression.
-
Click
Commit expression element changes to add the changes. -
Click
 Undo the previous change to cancel the last action executed.
 -
Click
 Redo the previous change to repeat the previous action executed.
 -
Click
 AND with a new expression element to create a logical AND with a new expression element.
 -
Click
 OR with a new expression element to create a logical OR with a new expression element.
 -
Click
 Wrap this expression element with a NOT to create a logical NOT on an expression element.
 -
Click
 Remove this expression element to take out the current expression element.
-
-
When you complete all of the changes to the condition, click Save.
Copying a Condition
You can copy a condition to create a similar condition, then change the values that are associated with it. You can copy the sample conditions that are provided to customize them to your environment.
-
Browse to menu: Control > Explorer.
-
Click the Conditions accordion, and select the condition that you want to copy.
-
Click
Configuration, Copy this Condition to a new Condition. -
Make all the changes that you need for the new condition. The description must be unique to all conditions.
-
Click Add.
Deleting a Condition
Remove conditions that are no longer applicable. You can delete only the conditions that are not part of a policy. To be able to delete the condition, you must remove the policy first.
-
Browse to menu: Control > Explorer.
-
Click the Conditions accordion, and click the condition that you want to remove.
-
Click
Configuration, Delete this VM and Instance Condition. -
Click OK to confirm.
Actions
Actions are performed after the condition is evaluated. Control comes with a set of default actions that you can choose from. You can also create some of your own.
| Action | Description |
|---|---|
| Cancel vCenter Task | Stop current vCenter Task. Due to limitations of vCenter, this applies only to cloning tasks. |
| Check Host or VM Compliance | Run compliance checks. |
| Collect Running Processes on VM Guest OS | Collect the list of running processes from the guest operating system. |
| Connect All CD-ROM Drives for Virtual Machine | Connect all the CD-ROM drives for the virtual machine. |
| Connect All Floppy Drives for Virtual Machine | Connect all the floppy drives for the virtual machine. |
| Connect All Floppy and CD-ROM Drives for Virtual Machine | Connect all of the floppy and CD-ROM drives for virtual machine. |
| Convert to Template | Convert this virtual machine to a template. |
| Delete all Snapshots | Remove all snapshots for a virtual machine. |
| Delete Most Recent Snapshot | Removes a virtual machine’s most recent snapshot. |
| Delete VM from Disk | Remove the virtual machine from disk. |
| Disconnect All CD-ROM Drives for Virtual Machine | Disconnect all the CD-ROM drives for the virtual machine. |
| Disconnect All Floppy Drives for Virtual Machine | Disconnect all the floppy drives for the virtual machine. |
| Disconnect All Floppy and CD-ROM Drives for Virtual Machine | Disconnect all of the floppy and CD-ROM drives for virtual machine. |
| Execute an external script | Run an external script. |
| Generate Audit Event | Write an entry to the audit log and to the VMDB. |
| Generate log message | Write an entry to the ManageIQ log. |
| Initiate SmartState Analysis for Host | Start a SmartState Analysis for a host. |
| Initiate SmartState Analysis for VM | Start a SmartState Analysis for a virtual machine. |
| Invoke a Custom Automation | For use with ManageIQ automate. It enables you to run tasks and notifications automatically. |
| Mark as Non-Compliant | Used with compliance policies. Mark resource as non-compliant. (Compliance status is viewable in summary screens.) |
| Prevent current event from proceeding | Stop the current event from continuing. |
| Put Virtual Machine Guest OS in Standby | Put the virtual machines operating system in standby mode. |
| Raise Automation Event | Used with ManageIQ automate. |
| Refresh data from vCenter | Perform a refresh of the vCenter. |
| Remove Virtual Machine from Inventory | Take the virtual machine out of inventory. |
| Retire Virtual Machine | Retire the virtual machine. (It remains in inventory, but cannot be started.) |
| Show EVM Event on Timeline | To show the EVM event on the timeline. |
| Shutdown Virtual Machines Guest OS | Shut down the virtual machine’s operating system. |
| Start Virtual Machine | Power on the virtual machine. |
| Stop Virtual Machine | Power off the virtual machine. |
| Suspend Virtual Machine | Suspend the virtual machine. |
Default Actions and Descriptions
Custom Actions
You can create a custom action by using the ManageIQ console. Enter a description and action type. Procedures for each type of action are shown in the following sections. When you create a policy, you can associate actions with specific events.
| Custom Action | Description |
|---|---|
| Assign Profile to Analysis Task | When initiating a Smart State Analysis event, you can assign a specific analysis profile. |
| Create a Snapshot | Creates a snapshot with a name that you provide. |
| Delete Snapshots by Age | Removes snapshots based on how old they are. |
| Evaluate Alerts | Checks for alerts. This is required for the alert to be delivered. |
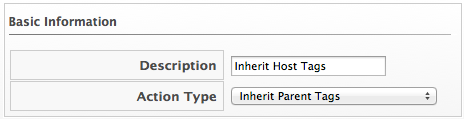
| Inherit Parent Tags | Assigns tags from the parent cluster, host, datastore, or resource pool. |
| Invoke a Custom Automation | For use with ManageIQ automate. |
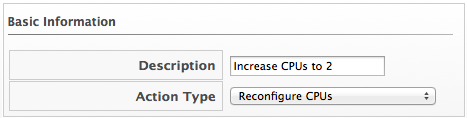
| Reconfigure CPUs | Reconfigure the number of CPUs for a virtual machine to the number you specify. |
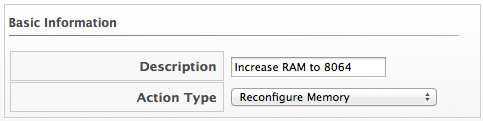
| Reconfigure Memory | Reconfigure the amount of memory for a virtual machine to the amount you specify. |
| Remove Tags | Removes tags from the resource. |
| Run Ansible Playbook | Run an Ansible playbook against an inventory selection. |
| Send an E-mail | Send an email to an address that you provide. This type of action can be used in an alert. |
| Send an SNMP trap | Send an SNMP (Simple Network Management Protocol) trap to the host you specify. This type of action can be used for an alert. |
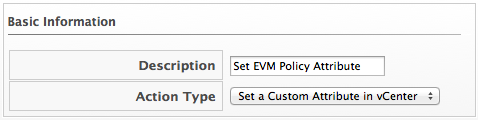
| Set a Custom Attribute in vCenter | Set the value of a custom attribute in vCenter. |
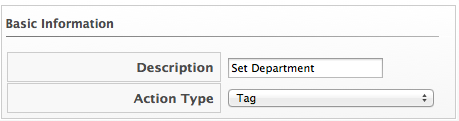
| Tag | Assign a company tag that you specify to a virtual machine. |
Custom Actions and Descriptions
Creating an Assign Profile to Analysis Task Action
Use this action for assigning specific analysis profiles to virtual machines. You must create an analysis profile before assigning it to an action. You can only assign this action to an analysis start event.
-
Browse to menu: Control > Explorer.
-
Click the Actions accordion, then click
Configuration, Add a new Action. -
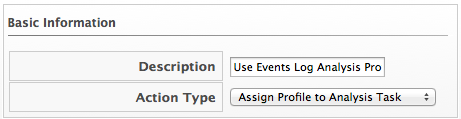
Type in a Description for the Action Type.
-
Select Assign Profile to Analysis Task from Action Type.
-
Select a profile from the Analysis profiles.
-
Click Add.
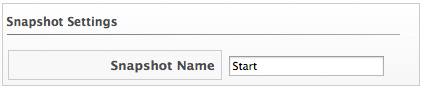
Creating a Snapshot Action
-
Browse to menu: Control > Explorer.
-
Click the Actions accordion, then click
Configuration, Add a new Action. -
Type in a Description for the action.

-
Select Create a Snapshot from Action Type.
-
Type in a Snapshot Name.
-
Click Add when you are finished.
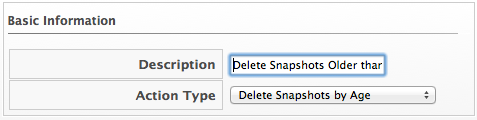
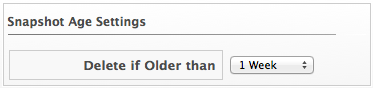
Deleting Snapshots by Age
-
Browse to menu: Control > Explorer.
-
Click the Actions accordion, then click
Configuration, Add a new Action. -
Type in a Description for the action.
-
Select Delete Snapshots by Age from Action Type.
-
Select the age of snapshots to delete.
-
Click Add.
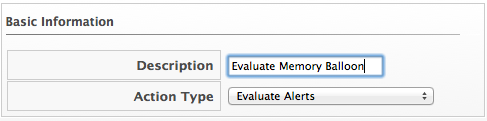
Evaluating an Alert
-
Browse to menu: Control > Explorer.
-
Click the Actions accordion, then click
Configuration, Add a new Action. -
Type in a Description for the action.
-
Select Evaluate Alerts from Action Type.
-
Select the alerts to be evaluated and click
(Move selected Alerts into this Action). Use the Ctrlkey to select multiple alerts.
-
Click Add.
Creating an Inherit Tag Action
-
Browse to menu: Control > Explorer.
-
Click the Actions accordion, and click
Configuration, Add a new Action. -
Type in a Description for the action.
-
Select Inherit Parent Tag from Action Type.
-
Select the type of parent item to inherit from in Parent Type.
-
Check all categories that you want inherited.

-
Click Add.
Creating a CPU Reconfigure Action
-
Browse to menu: Control > Explorer.
-
Click the Actions accordion, then click
Configuration, Add a new Action. -
Type in a Description for the action.
-
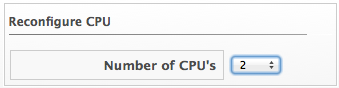
Select Reconfigure CPUs from Action Type.
-
Select a number from Number of CPUs.
-
Click Add.
Creating a Memory Reconfigure Action
-
Browse to menu: Control > Explorer.
-
Click the Actions accordion, then click
Configuration, Add a new Action. -
Type in a Description for the action.
-
Select Reconfigure Memory from Action Type.
-
Type in a new value for Memory Size.

-
Click Add.
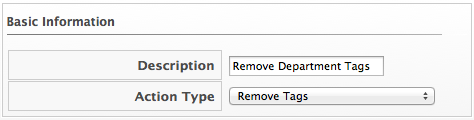
Creating a Remove Tag Action
-
Browse to menu: Control > Explorer.
-
Click the Actions accordion, then click
Configuration, Add a new Action. -
Type in a Description for the action.
-
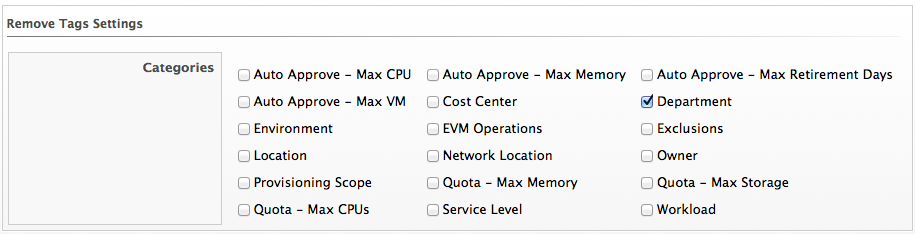
Select Remove Tags from Action Type.
-
Check the category of tags you want to remove.
-
Click Add.
Creating an Ansible Playbook Run Action
Use this action to run an Ansible Playbook against your inventory. You must first sync a playbook repository and add an Ansible Playbook service catalog item.
-
Browse to menu: Control > Explorer.
-
Click the Actions accordion, and click
Configuration, Add a new Action. -
Type in a Description for the action.
-
Select Run Ansible Playbook from Action Type.
-
Select the playbook catalog item to run from Playbook Catalog Item.
-
Check the inventory against which you run the Ansible playbook.
- If Specific Hosts is selected, provide the IP or DNS names.
-
Click Add.
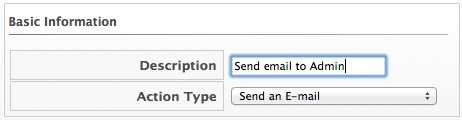
Creating an E-mail Action
To send emails from the ManageIQ server, you must have the notifier server role enabled and have defined settings for SMTP email.
-
Browse to menu: Control > Explorer.
-
Click the Actions accordion, then click
Configuration, Add a new Action. -
Type in a Description for the action.
-
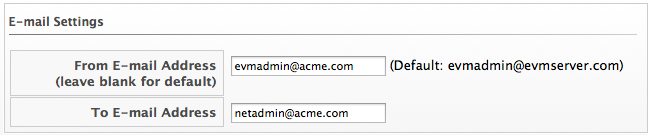
Select Send an E-mail from Action Type.
-
Type in a From E-mail Address and To E-mail Address.
-
Click Add.
Creating an SNMP Action
To send SNMP traps from the ManageIQ server, you must have the Notifier server role and the SNMP daemons enabled.
-
Browse to menu: Control > Explorer.
-
Click the Actions accordion, then click
Configuration, Add a new Action. -
Enter a Description for the action.
-
Select Send an SNMP Trap from Action Type.
-
Type in the IP for the host to send the trap to, select the version of SNMP that you are using, and type in the Trap Object ID. Type in multiple hosts if you require the trap sent to multiple SNMP hosts.
-
If using SNMP V1, you are prompted for a Trap Number. Type 1, 2, or 3, based on the appropriate Suffix Number from table below.
-
If using SNMP V2, you are prompted for a Trap Object ID. Type info, warning, or critical, based on the table below.
Object ID Suffix Number Added to PEN PEN with the Suffix Added info 1 1.3.6.1.4.1.33482.1 warn, warning 2 1.3.6.1.4.1.33482.2 crit, critical, error 3 1.3.6.1.4.1.33482.3 Trap Object ID and Suffix Number
-
-
Type in the variables that you require in your message.
-
Click Add.
Note: When adding an SNMP action, be sure to set it as asynchronous.
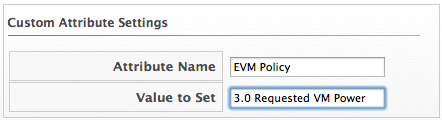
Creating a Set Custom Attribute Action
The custom attribute must already exist in vCenter. See vCenter documentation for instructions. In this example, an attribute called ManageIQ policy already exists.
-
Browse to menu: Control > Explorer.
-
Click the Actions accordion, then click
Configuration, Add a new Action. -
Type in a Description for the action.
-
Select Set a Custom Attribute in vCenter from Action Type.
-
Type in the Attribute Name and Value to Set.
-
Click Add.
Creating a Tag Action
-
Browse to menu: Control > Explorer.
-
Click the Actions accordion, then click
Configuration, Add a new Action. -
Type in a Description for the action.
-
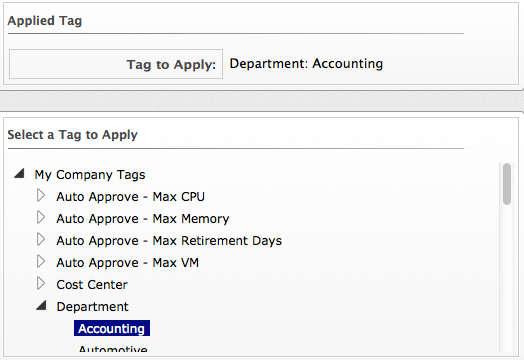
Select Tag from Action Type.
-
Click on the appropriate tag to apply from the list provided.
-
Click Add.
Editing an Action
Edit an action to modify its properties. You can’t edit any of the default actions that are supplied with ManageIQ. Only actions that you create can be changed.
Note: When you view an action, you can see what policies it is assigned to.
-
Browse to menu: Control > Explorer.
-
Click the Actions accordion, and then click the action that you need to edit.
-
Click
Configuration, Edit this Action on the detail view of the action. -
Make any required changes.
-
Click Save.
The action is modified and can be added to a policy. If the action is already party of a policy, the policy is automatically updated.
Deleting an Action
Delete unused actions to keep your environment uncluttered. You can’t delete default actions or actions that are currently assigned to a policy. The delete button is unavailable if the action is in use.
-
Browse to menu: Control > Explorer.
-
Click the Actions accordion, click the action that you need to remove.
-
Click
Configuration, Delete this Action on the detail view of the tree. -
Click OK to confirm.
Policy Profiles
Policy profiles are groups of policies that you can assign wholesale to virtual machines, providers, clusters, hosts, resource pools, replicators, pods, container nodes, and container images. Policy profiles provide a framework for easily managing and assigning different levels of security, across various types of cloud resources.
Creating Policy Profiles
-
Navigate to menu:Control[Explorer].
-
Click on the Policy Profiles accordion, then click
(Configuration), then
(Add a New Policy Profile). -
In the Basic Information area, type in a unique description for the policy profile.

-
From Available Policies in the Policy Selection area select all the policies you need to apply to this policy profile. Use the
Ctrlkey to select multiple policies.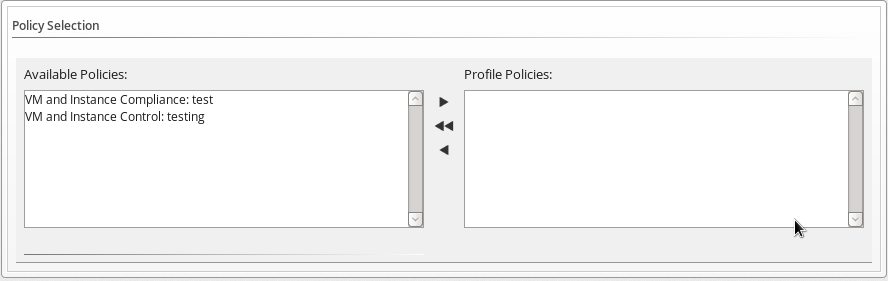
-
Click
to add the Policies.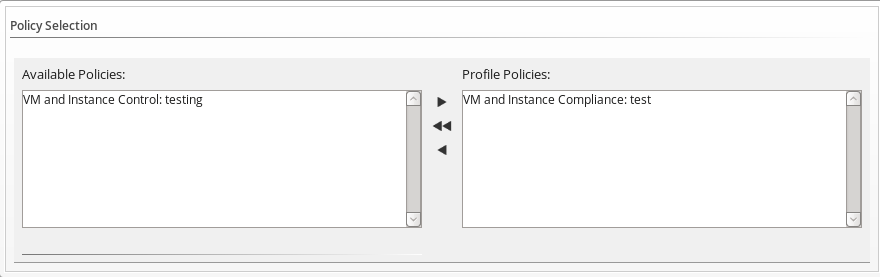
-
Add to the Notes area if required.
-
Click Add.
The policy profile is added. You can now assign the policy profile to providers, hosts, and repositories. In addition, you can verify that the virtual machine complies with the policy profile by using the Resultant Set of Policy feature.
Deleting a Policy Profile
Remove policy profiles that you no longer need. This doesn’t remove the policies that are associated with the policy profile.
-
Browse to menu: Control > Explorer.
-
Click the Policy Profile accordion, and then click the policy profile that you want to remove.
-
Click
Configuration, Remove this Policy Profile. -
Click OK to confirm.
Simulating Policy
Before assigning a policy profile to a virtual machine, use the ManageIQ controls policy simulation feature to determine if a virtual machine passes a policy profile.
Simulating Policy Profiles on Virtual Machines
-
Browse to menu: Compute > Infrastructure > Virtual Machines, select the virtual machines that you need to evaluate.
-
Click
Policy, and then click  Policy Simulation.
 -
From the Select a Policy Profile to add dropdown, click the policy that you need to apply to the selected virtual machines.
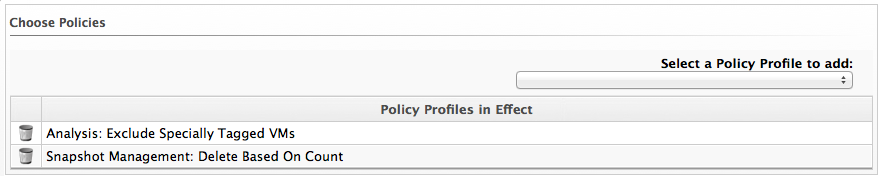
-
The virtual machine thumbnail displays in the Policy Simulation area.
-
A check sign in the virtual thumbnail shows that the virtual machine passes policy.
-
A minus sign in the virtual thumbnail shows that the virtual machine fails policy.
-
-
Click a virtual machine in the Policy Simulation area to see its details.
-
Expand a policy profile by clicking it to see its member policies and the status of the conditions.
-
Check Show out of scope items to show all conditions, whether the virtual machine passes the scope part of the condition. Uncheck it to hide conditions where the scope part fails.
-
Next to Show policies, check Successful to show policies that are passed and check Failed to see the policies that have failed. The default is to show both.
-
Items in green text passed the condition.
-
Items in red text failed the condition.
-
Items in red italics failed the condition, but do not change the outcome of the scope.
-
If you evaluate multiple policy profiles, you can see both policy profiles and a tree expanding down to their conditions.
Assigning Policy Profiles
After creating your policy profiles, you are ready to evaluate and assign them.
-
Assign a policy profile to a virtual machine to apply the policy profile to a specific virtual machine, independent of its related host, provider, or repository.
-
Assign a policy profile to a provider to apply the policy profile to all virtual machines, hosts, replicators, pods, container nodes or container images registered to that provider.
-
Assign a policy profile to a replicator to apply the policy profile to that specific replicator.
-
Assign a policy profile to a pod to apply the policy profile to that specific pod.
-
Assign a policy profile to a container node to apply the policy profile to that specific node.
-
Assign a policy profile to a container image to apply the policy profile to that specific image.
-
Assign a policy profile to a cluster to apply the policy profile to all virtual machines or hosts assigned to that cluster.
-
Assign a VM policy profile to a host to apply the policy profile to that specific host or all virtual machines registered to that host.
-
Assign a VM policy profile to a resource pool to apply the policy profile to all virtual machines or hosts assigned to that resource pool.
Assigning Policy Profiles to an Infrastructure Provider
-
Navigate to menu:Compute[Infrastructure > Providers], verify the provider you need to assign the policy profiles to.
-
Click
(Policy), and then click
(Manage Policies). -
From the Select Policy Profiles area, you can click on the triangle next to a desired policy profile to expand it and see its member policies.
-
Check the policy profiles you require to apply to the provider. It turns blue to show its assignment state has changed.
-
Click Save.
Removing Policy Profiles from an Infrastructure Provider
-
Browse to menu: Compute > Infrastructure > Providers, check the providers that you want to remove the policy profile from.
-
Click
Policy, and then click Manage Policies. -
Uncheck the policy profile that you need to remove. It turns blue to show that its assignment state changed.
-
Click Save.
Assigning Policy Profiles to a Cluster
-
Browse to menu: Compute > Infrastructure > Clusters, check the clusters that you need to assign policy profiles to.
-
Click
Policy, and then click Manage Policies. -
From the Select Policy Profiles area, you can click the triangle next to a desired policy profile to expand it and see its member policies.
-
Check the policy profiles that you need to apply to the cluster. It turns blue to show that its assignment state changed.
-
Click Save.
Removing Policy Profiles from a Cluster
-
Browse to menu: Compute > Infrastructure > Clusters, check the clusters that you need to remove the policy profiles from.
-
Click
Policy, and then click Manage Policies. -
From the Select Policy Profiles area, you can click the triangle next to a desired policy profile to expand it and see its member policies.
-
Uncheck the policy profiles that you need to remove. It turns blue to show that its assignment state changed.
-
Click Save.
Assigning Policy Profiles to a Host
-
Browse to menu: Compute > Infrastructure > Hosts, check the hosts that you need to assign policy profiles to.
-
Click
Policy, and then click Manage Policies. -
From the Select Policy Profiles area, click the triangle next to a desired policy profile to expand it and see its member policies.
-
Check the policy profiles that you need to apply to the host. It turns blue to show that its assignment state changed.
-
Click Save.
Removing Policy Profiles from a Host
-
Browse to menu: Compute > Infrastructure > Hosts, check the hosts that you need to remove the policy profiles from.
-
Click
Policy, and then click Manage Policies. -
Uncheck the policy profiles that you need to remove. It turns blue to show that its assignment state changed.
-
Click Save.
Assigning Policy Profiles to a Virtual Machine
-
Browse to menu: Compute > Infrastructure > Virtual Machines, check the virtual machines that you need to assign policy profiles to.
-
Click
Policy, and then click Manage Policies. -
From the Select Policy Profiles area, click the triangle next to a desired policy profile to expand it and see its member policies.
-
Check the policy profiles that you need to apply to the host. It turns blue to show that its assignment state changed.
-
Click Save.
Removing Policy Profiles from a Virtual Machine
-
Browse to menu: Compute > Infrastructure > Virtual Machines, check the virtual machines that you want to remove the policy profile from.
-
Click
Policy, and then click Manage Policies. -
Uncheck the policy profile that you need to remove. It turns blue to show that its assignment state changed.
-
Click Save.
Assigning Policy Profiles to a Resource Pool
-
Browse to menu: Compute > Infrastructure > Resource Pools, check the resource pools that you need to assign policy profiles to.
-
Click
Policy, and then click Manage Policies. -
From the Select Policy Profiles area, click the triangle next to a desired policy profile to expand it and see its member policies.
-
Click the policy profiles that you need to apply to the resource pools. It turns blue to show that its assignment state changed.
-
Click Save.
Removing Policy Profiles from a Resource Pool
-
Browse to menu: Compute > Infrastructure > Resource Pools, check the resource pools that you need to remove the policy profiles from.
-
Click
Policy, and then click Manage Policies. -
From the Select Policy Profiles area, click the triangle next to a desired policy profile to expand it and see its member policies.
-
Uncheck the policy profiles that you need to remove. It turns blue to show that its assignment state changed.
-
Click Save.
Assigning Policy Profiles to a Cloud Provider
-
Browse to menu: Compute > Clouds > Providers and check the provider that you need to assign the policy profiles to.
-
Click
Policy, and then click Manage Policies. -
From the Select Policy Profiles area, click the triangle next to a wanted policy profile to expand it and see its member policies.
-
Check the policy profiles that you need to apply to the provider. The ones that are different from the previous setting shows in blue.
-
Click Save.
Removing Policy Profiles from a Cloud Provider
-
Browse to menu: Compute > Clouds > Providers, check the providers that you need to remove the policy profile from.
-
Click
Policy, and then click Manage Policies. -
From the Select Policy Profiles area, click the triangle next to a desired policy profile to expand it and see its member policies.
-
Uncheck the policy profile that you need to remove. It turns blue to show that its assignment state changed.
-
Click Save.
Assigning Policy Profiles to a Network Provider
-
Browse to menu: Networks > Providers, check the network provider that you need to assign the policy profiles to.
-
Click
Policy, and then click Manage Policies. -
From the Select Policy Profiles area, click the triangle next to a wanted policy profile to expand it and see its member policies.
-
Check the policy profiles that you need to apply to the provider. The ones that are different from the previous setting shows in blue.
-
Click Save.
Removing Policy Profiles from a Network Provider
-
Browse to menu: Networks > Providers, check the network providers that you need to remove the policy profiles from.
-
Click
Policy, and then click Manage Policies. -
From the Select Policy Profiles area, click the triangle next to a desired policy profile to expand it and see its member policies.
-
Uncheck the policy profile that you need to remove. It turns blue to show that its assignment state changed.
-
Click Save.
Assigning Policy Profiles to a Container Provider
-
Browse to menu: Compute > Containers > Providers and select the provider that you need to assign the policy profiles to.
-
Click
Policy, and then click Manage Policies. -
From the Select Policy Profiles area, click the triangle next to a wanted policy profile to expand and see its member policies.
-
Select the policy profiles that you need to apply to the provider. It turns blue to show the selection.
-
Click Save.
Removing Policy Profiles from a Container Provider
-
Browse to menu: Compute > Containers > Providers, select the container providers that you need to remove the policy profiles from.
-
Click
Policy, and then click Manage Policies. -
From the Select Policy Profiles area, click the triangle next to a desired policy profile to expand it and see its member policies.
-
Uncheck the policy profile that you need to remove. It turns blue to show that its assignment state changed.
-
Click Save.
Assigning Policy Profiles to a Replicator
-
Browse to menu: Compute > Containers > Replicators and select the replicator that you need to assign the policy profiles to.
-
Click
Policy, and then click Manage Policies. -
From the Select Policy Profiles area, click the triangle next to a wanted policy profile to expand and see its member policies.
-
Select the policy profiles that you need to apply to the replicator. It turns blue to show the selection.
-
Click Save.
Removing Policy Profiles from a Replicator
-
Browse to menu: Compute > Containers > Replicators, select the replicators that you need to remove the policy profiles from.
-
Click
Policy, and then click Manage Policies. -
From the Select Policy Profiles area, click the triangle next to a desired policy profile to expand it and see its member policies.
-
Uncheck the policy profile that you need to remove. It turns blue to show that its assignment state changed.
-
Click Save.
Assigning Policy Profiles to a Pod
-
Browse to menu: Compute > Containers > Pods and select the pod that you need to assign the policy profiles to.
-
Click
Policy, and then click Manage Policies. -
From the Select Policy Profiles area, click the triangle next to a wanted policy profile to expand and see its member policies.
-
Select the policy profiles that you need to apply to the pod. It turns blue to show the selection.
-
Click Save.
Removing Policy Profiles from a Pod
-
Browse to menu: Compute > Containers > Pods, select the pods that you need to remove the policy profiles from.
-
Click
Policy, and then click Manage Policies. -
From the Select Policy Profiles area, click the triangle next to a desired policy profile to expand it and see its member policies.
-
Uncheck the policy profile that you need to remove. It turns blue to show that its assignment state changed.
-
Click Save.
Assigning Policy Profiles to a Container Node
-
Browse to menu: Compute > Containers > Container Nodes and select the container node that you need to assign the policy profiles to.
-
Click
Policy, and then click Manage Policies. -
From the Select Policy Profiles area, click the triangle next to a wanted policy profile to expand and see its member policies.
-
Select the policy profiles that you need to apply to the node. It turns blue to show the selection.
-
Click Save.
Removing Policy Profiles from a Container Node
-
Browse to menu: Compute > Containers > Container Nodes**, select the container nodes that you need to remove the policy profiles from.
-
Click
Policy, and then click Manage Policies. -
From the Select Policy Profiles area, click the triangle next to a desired policy profile to expand it and see its member policies.
-
Uncheck the policy profile that you need to remove. It turns blue to show that its assignment state changed.
-
Click Save.
Assigning Policy Profiles to a Container Image
-
Browse to menu: Compute > Containers > Container Images and select the image that you need to assign the policy profiles to.
-
Click
Policy, and then click Manage Policies. -
From the Select Policy Profiles area, click the triangle next to a wanted policy profile to expand and see its member policies.
-
Select the policy profiles that you need to apply to the image. It turns blue to show the selection.
-
Click Save.
Removing Policy Profiles from a Container Image
-
Browse to menu: Compute > Containers > Container Images, select the container images that you need to remove the policy profiles from.
-
Click
Policy, and then click Manage Policies. -
From the Select Policy Profiles area, click the triangle next to a desired policy profile to expand it and see its member policies.
-
Uncheck the policy profile that you need to remove. It turns blue to show that its assignment state changed.
-
Click Save.
Assigning Policy Profiles to an Instance
-
Browse to menu: Compute > Clouds > Instances, check the instances that you want to assign policy profiles to.
-
Click
Policy, and then click Manage Policies. -
From the Select Policy Profiles area, click the triangle next to a wanted policy profile to expand it and see its member policies.
-
Check the policy profiles that you want to apply to the instances. It turns blue to show that its assignment state changed.
-
Click Save.
Removing Policy Profiles from an Instance
-
Browse to menu: Compute > Clouds > Instances, check the instances that you need to remove the policy profile from.
-
Click
Policy, and then click Manage Policies. -
From the Select Policy Profiles area, click the triangle next to a desired policy profile to expand it and see its member policies.
-
Uncheck the policy profile that you need to remove. It turns blue to show that its assignment state changed.
-
Click Save.
Disabling a Policy in a Policy Profile
You can disable one policy in a profile without removing it from the policy, perhaps for trouble shooting purposes or because the policy is not required temporarily.
-
Browse to menu: Control > Explorer.
-
Click the Policies accordion, then navigate to the policy that you need to disable or navigate to the policy from the policy profile.
-
Click
Configuration, Edit Basic Info, Scope, Notes. -
Uncheck Active.
-
Click Save.
Viewing Policy Simulation - Resultant Set of Policy (RSOP)
After the Policy Profiles are assigned, you can see the final result of the resolution of all policies based on which Events occur. Based on the result, you can adjust your Policies. To view RSOP, go to the control area in the ManageIQ console.
-
Browse to menu: Control > Simulation.
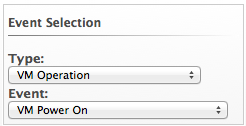
-
From the Event Selection area, select a type of event, and then the specific event you need the result for.
-
From the VM Selection area, select the virtual machine from a provider, cluster, host, or a single virtual machine.
-
Click Submit.
Exporting and Importing Analysis Profiles
ManageIQ SmartState analysis requires an analysis profile to select the files to be scanned by a compliance policy. ManageIQ allows the export and import of SmartState analysis profiles by using the command line and rake commands. As a result, approved configurations can be easily imported into customer environments, without having to manually recreate the profile through the user interface.
-
Change to the
vmdbdirectory:cd /var/www/miq/vmdb -
Create an export directory:
$ mkdir exports -
To export an analysis profile, run:
bundle exec rake evm:export:scan_profiles -- --directory exports -
To import the default analysis profile, run:
bundle exec rake evm:import:scan_profiles -- --source exports/host_default.yamlNote:
If the default profile exists in ManageIQ, the new profile does not overwrite the old profile. Instead, it duplicates the file items in the default profile.
Appendix
Events
Events are triggers that cause a condition to be tested. Control provides several Events, that can be divided into functional types. Events cannot be modified.
| Category | Description |
|---|---|
| Container Operation | Events related to container analysis. |
| Datastore Operation | Events related to datastore analysis. |
| Authentication Validation | Events related to credential validation for hosts and providers. |
| Company Tag | Events related to assigning and removing company tags from an infrastructure object. |
| Compliance | Events related to checking compliance policies. |
| Host Operation | Events related to the connection state of a host and status of a SmartState Analysis on a host. |
| Orchestration Lifecycle | Events related to orchestration lifecycle, such as retirement. |
| Physical Server Operation | Events related to the connection state of a physical server. |
| VM Configuration | Events associated with a change in configuration of a virtual machine. These include, but are not limited to, clone, create, template create, and settings change. |
| VM Lifecycle | Events such as virtual machine discovery, provisioning, and virtual machine retirement. |
| VM Operation | Events associated with power states or locations of virtual machines and virtual desktop machines. These include, but are not limited to, power off, power on, reset, resume, shutdown, and suspend. |
| Service Lifecycle | Events associated with service lifecycle. These include, but are not limited to, provisioning completed, start request, started, stop request, stopped, retirement warning, and retired. |
Event Types
Each type has a set of events that you can select to trigger the checking of a condition.
| Event | Description |
|---|---|
| Container Image Analysis Request | Check the condition when an analysis of a container image is requested. |
| Container Image Analysis Complete | Check the condition when an analysis of a container image completes. |
| Container Image Discovered | Check the condition when a new container image is discovered. |
| Container Image Compliance Check | Check the condition when a compliance check is performed on an image. |
| Container Image Compliance Passed | Check the condition when an image passes a compliance check. |
| Container Image Compliance Failed | Check the condition when an image fails a compliance check. |
| Container Node Failed Mount | Check the condition when a node fails to mount a volume for a pod. |
| Container Node Invalid Disk Capacity | Check the condition when a node’s disk capacity is invalid. |
| Container Node Not Ready | Check the condition when a node is not ready. |
| Container Node Not Schedulable | Check the condition when a node is not schedulable. |
| Container Node Ready | Check the condition when a node is ready. |
| Container Node Schedulable | Check the condition when a node is schedulable. |
| Container Node Rebooted | Check the condition when a node reboots. |
| Container Node Compliance Check | Check the condition when a compliance check is performed on a node. |
| Container Node Compliance Passed | Check the condition when a node passes a compliance check. |
| Container Node Compliance Failed | Check the condition when a node fails a compliance check. |
| Pod Compliance Check | Check the condition when a compliance check is performed on a pod. |
| Pod Compliance Passed | Check the condition when a pod passes a compliance check. |
| Pod Compliance Failed | Check the condition when a pod fails a compliance check. |
| Pod Container Created | Check the condition when a container is created in a pod. |
| Pod Container Failed | Check the condition when a container in a pod fails. |
| Pod Container Killing | Check the condition when a container in a pod is killed. |
| Pod Container Started | Check the condition when a container in a pod is started. |
| Pod Container Stopped | Check the condition when a container in a pod is stopped. |
| Pod Container Unhealthy | Check the condition when a container in a pod is unhealthy. |
| Pod Deadline Exceeded | Check the condition when a pod with specified deadline exceeds it and is terminated. |
| Pod Failed Scheduling | Check the condition when scheduling a pod fails. |
| Pod Failed Sync | Check the condition when getting a pod to its desired state fails (a frequent reason is failure to download the image). |
| Pod Failed Validation | Check the condition when a pod validation fails. |
| Pod hostPort Conflict | Check the condition when a pod hostPort conflict occurs. |
| Pod Insufficient Free CPU | Check the condition when there is an insufficient free CPU in a pod. |
| Pod Insufficient Free Memory | Check the condition when there is an insufficient free memory in a pod. |
| Pod nodeSelector Mismatching | Check the condition when a pod nodeSelector mismatches. |
| Pod Out of Disk | Check the condition when a pod is out of disk space. |
| Pod Scheduled | Check the condition when a pod is scheduled onto the node. |
| Replicator Failed Creating Pod | Check the condition when a replicator fails creating a pod. |
| Replicator Successfully Created Pod | Check the condition when a replicator successfully creates a pod. |
| Replicator Compliance Check | Check the condition when a compliance check is performed on a replicator. |
| Replicator Compliance Passed | Check the condition when a replicator passes a compliance check. |
| Replicator Compliance Failed | Check the condition when a replicator fails a compliance check. |
| Database Failover Executed | Check the condition when a database failover is executed. |
| Datastore Analysis Complete | Check the condition when a SmartState Analysis of a datastore completes. |
| Datastore Analysis Request | Check the condition when a SmartState Analysis for a datastore is requested from the user interface. |
| Host Added to Cluster | Check the condition when a host is added to a cluster. |
| Host Analysis Complete | Check the condition when a SmartState Analysis of host completes. |
| Host Analysis Request | Check the condition when a SmartState Analysis is requested from the ManageIQ console. |
| Host Auth Changed | Check the condition when host authentication credentials are changed in the ManageIQ console. |
| Host Auth Error | Check the condition if there is any other error connecting to the host such as ssh/vim handshaking problems, timeouts, or any other uncategorized error. |
| Host Auth Incomplete Credentials | Check the condition if host authentication credentials are not complete in the user interface. |
| Host Auth Invalid | Check the condition if ManageIQ is able to communicate with the host and the credentials fail. |
| Host Auth Unreachable | Check the condition if ManageIQ is unable to communicate with the host. |
| Host Auth Valid | Check the condition when the host authentication credentials entered in the ManageIQ console are valid. |
| Host C & U Processing Complete | Check the condition when the processing of capacity and utilization data has finished. |
| Host Compliance Check | Check the condition when a compliance check is performed on a host. |
| Host Compliance Failed | Check the condition when a host fails a compliance check. |
| Host Compliance Passed | Check the condition when a host passes a compliance check. |
| Host Connect | Check the condition when a host connects to a provider. |
| Host Disconnect | Check the condition when a host disconnects from a provider. |
| Host Maintenance Enter Request | Check the condition when a host requests to enter maintenance mode. |
| Host Maintenance Exit Request | Check the condition when a host requests to exit maintenance mode. |
| Host Provision Complete | Check the condition when the host provision is complete. |
| Host Reboot Request | Check the condition when someone tries to reboot a host from the ManageIQ console. |
| Host Removed from Cluster | Check the condition when a host is removed from a cluster. |
| Host Reset Request | Check the condition when a host is restarted from the ManageIQ console. |
| Host Shutdown Request | Check the condition when a host is shut down from the ManageIQ console. |
| Host Standby Request | Check the condition when someone tries to put the operating system of a host in standby from the ManageIQ console. |
| Host Start Request | Check the condition when a host is started from the ManageIQ console. |
| Host Stop Request | Check the condition when a host is requested to stop from the ManageIQ console. |
| Host Vmotion Disable Request | Check the condition when a request to disable vMotion on a host is created from the ManageIQ console. |
| Host Vmotion Enable Request | Check the condition when a request to enable vMotion on a host is created from the ManageIQ console. |
| Orchestration Stack Retire Request | Check the condition when an orchestration stack retirement request is created from ManageIQ. |
| Physical Server Reset | Check the condition when a physical server is restarted from the ManageIQ console. |
| Physical Server Shutdown | Check the condition when a physical server is shut down from the ManageIQ console. |
| Physical Server Start | Check the condition when a physical server is started from the ManageIQ console. |
| Provider Auth Changed | For use only with ManageIQ automate, for future use in policies. Check the condition when provider authentication credentials are changed in the user interface. |
| Provider Auth Error | For use only with ManageIQ automate, for future use in policies. Check the condition if there is any other error connecting to the provider such as ssh/vim handshaking problems, timeouts, or any other uncategorized error. |
| Provider Auth Incomplete Credentials | For use only with ManageIQ automate, for future use in policies. Check the condition if provider authentication credentials are not complete in the ManageIQ console. |
| Provider Auth Invalid | For use only with ManageIQ automate, for future use in policies. Check the condition if ManageIQ is able to communicate with the provider and the credentials fail. |
| Provider Auth Unreachable | For use only with ManageIQ automate, for future use in policies. Check the condition if ManageIQ is unable to communicate with the provider. |
| Provider Auth Valid | For use only with ManageIQ automate, for future use in policies. Check the condition when the provider authentication credentials entered in the user interface are valid. |
| Provider Compliance Check | Check the condition when a compliance check is performed on a provider. |
| Provider Compliance Failed | Check the condition when a provider fails a compliance check. |
| Provider Compliance Passed | Check the condition when a provider passes a compliance check. |
| Service Provision Complete | Check the condition when the service provision is complete. |
| Service Retire Request | Check the condition when a service retirement request is created from ManageIQ. |
| Service Retired | Check the condition when the service has been retired. |
| Service Retirement Warning | Check the condition when the service is about to retire. |
| Service Start Request | Check the condition when the service has been requested to start. |
| Service Started | Check the condition when the service has started. |
| Service Stop Request | Check the condition when the service has been requested to stop. |
| Service Stopped | Check the condition when the service has stopped. |
| Tag Complete | Check the condition after a company tag is assigned. |
| Tag Parent Cluster Complete | Check the condition after a company tag is assigned to a virtual machine’s parent cluster. |
| Tag Parent Datastore Complete | Check the condition after a company tag is assigned to a virtual machine’s parent datastore. |
| Tag Parent Host Complete | Check the condition after a company tag is assigned to a virtual machine’s parent host. |
| Tag Parent Resource Pool Complete | Check the condition after a company tag is assigned to a virtual machine’s parent resource pool. |
| Tag Request | Check the condition when assignment of a company tag is attempted. |
| Un-Tag Complete | Check the condition when a company tag is removed. |
| Un-Tag Parent Cluster Complete | Check the condition after a company tag is removed from a virtual machine’s parent cluster. |
| Un-Tag Parent Datastore Complete | Check the condition after a company tag is removed from a virtual machine’s parent datastore. |
| Un-Tag Parent Host Complete | Check the condition after a company tag is removed from a virtual machine’s parent host. |
| Un-Tag Parent Resource Pool Complete | Check the condition after a company tag is removed from a virtual machine’s parent resource pool. |
| Un-Tag Request | Check the condition when an attempt is made to remove a company tag. |
| VDI Connecting to Session | Check the condition when a VDI session is started. |
| VDI Disconnected from Session | Check the condition when a VDI session is disconnected. |
| VDI Login Session | Check the condition when a user logs on to a VDI session. |
| VDI Logoff Session | Check the condition when a user logs off from a VDI session. |
| VM Analysis Complete | Check the condition when a SmartState Analysis of virtual machine completes. |
| VM Analysis Failure | Check the condition when a SmartState Analysis of virtual machine fails. |
| VM Analysis Request | Check the condition when a SmartState Analysis is requested from the ManageIQ console. |
| VM Analysis Start | Check the condition when a SmartState Analysis of virtual machine is started. |
| VM C & U Processing Complete | Check the condition when the processing of capacity and utilization data has finished. |
| VM Clone Complete | Check the condition when a virtual machine is cloned. |
| VM Clone Start | Check the condition when a virtual machine clone is started. |
| VM Compliance Check | Check the condition when a compliance check is performed on a virtual machine. |
| VM Compliance Failed | Check the condition when a virtual machine fails a compliance check. |
| VM Compliance Passed | Check the condition when a virtual machine passes a compliance check. |
| VM Create Complete | Check the condition when a virtual machine is created. |
| VM Delete (from Disk) | Check the condition when a disk on a virtual machine is deleted. |
| VM Delete (from Disk) Request | Check the condition when someone tries to delete a virtual machine from disk from the user interface. |
| VM Guest Reboot | Check the condition when a virtual machine is rebooted. |
| VM Guest Reboot Request | Check the condition when someone tries to reboot a virtual machine from the ManageIQ console. |
| VM Guest Shutdown | Check the condition when the operating system of a virtual machine shuts down. |
| VM Guest Shutdown Request | Check the condition when someone tries to shut down the operating system of a virtual machine from the user interface. |
| VM Live Migration (VMOTION) | Check the condition when a vMotion migration is performed. |
| VM Pause | Check the condition when a virtual machine is paused. |
| VM Pause Request | Check the condition when someone tries to pause a virtual machine from the ManageIQ console. |
| VM Power Off | Check the condition when a virtual machine is turned off. |
| VM Power Off Request | Check the condition when someone tries to power off a virtual machine from the ManageIQ console. |
| VM Power On | Check the condition when a virtual machine is turned on. |
| VM Power On Request | Check the condition when someone tries to turn on a virtual machine from the ManageIQ console. |
| VM Provision Complete | Check the condition when a virtual machine is provisioned. |
| VM Remote Console Connected | Check the condition when a virtual machine is connected to a remote console. |
| VM Removal from Inventory | Check the condition when a virtual machine is unregistered. |
| VM Removal from Inventory Request | Check the condition when a request is sent from the ManageIQ console to unregister a virtual machine. |
| VM Renamed Event | Check the condition when a virtual machine is renamed on its provider. |
| VM Reset | Check the condition when a virtual machine is restarted. |
| VM Reset Request | Check the condition when a virtual machine is restarted from the ManageIQ console. |
| VM Resume | Check the condition when a virtual machine is resumed. |
| VM Retire Request | Check the condition when a virtual machine retirement request is created from ManageIQ. |
| VM Retired | Check the condition when a virtual machine is retired. |
| VM Retirement Warning | Check the condition when a warning threshold is reached for retirement. |
| VM Settings Change | Check the condition when the settings of virtual machine are changed. |
| VM Shelve | Check the condition when a virtual machine is shelved. |
| VM Shelve Offload | Check the condition when a virtual machine is removed and deleted with the shelve offload operation. |
| VM Shelve Offload Request | Check the condition when a shelve offload request is created from ManageIQ for a virtual machine. |
| VM Shelve Request | Check the condition when a virtual machine shelve request is created from ManageIQ. |
| VM Snapshot Create Complete | Check the condition when a snapshot is completed. |
| VM Snapshot Create Request | Check the condition when someone tries to create a snapshot of a virtual machine from the user interface. |
| VM Snapshot Create Started | Check the condition when a snapshot creation is started. |
| VM Standby of Guest | Check the condition when the operating system of a virtual machine goes to standby. |
| VM Standby of Guest Request | Check the condition when someone tries to put the operating system of a virtual machine in standby from the ManageIQ console. |
| VM Suspend | Check the condition when a virtual machine is suspended. |
| VM Suspend Request | Check the condition when someone tries to suspend a virtual machine from the ManageIQ console. |
| VM Template Create Complete | Check the condition when a virtual machine template is created. |
Events and Descriptions