Installing on IBM Cloud
Installing ManageIQ
Installing ManageIQ consists of the following steps:
-
Downloading the appliance for your environment as a virtual machine image template.
-
Setting up a virtual machine based on the appliance.
-
Configuring the ManageIQ appliance.
After you have completed all the procedures in this guide, you will have a working environment on which additional customizations and configurations can be performed.
Obtaining the ManageIQ Virtual Appliance
Uploading and Provisioning the ManageIQ Virtual Appliance in IBM Cloud
To upload the ManageIQ appliance file in IBM Cloud, ensure the following requirements are met:
-
Approximately 2 GB of space for each image; 44+ GB of space, 12 GB RAM, and 4 VCPUs for the ManageIQ appliance.
-
You must have an IBM Cloud user account with the following roles:
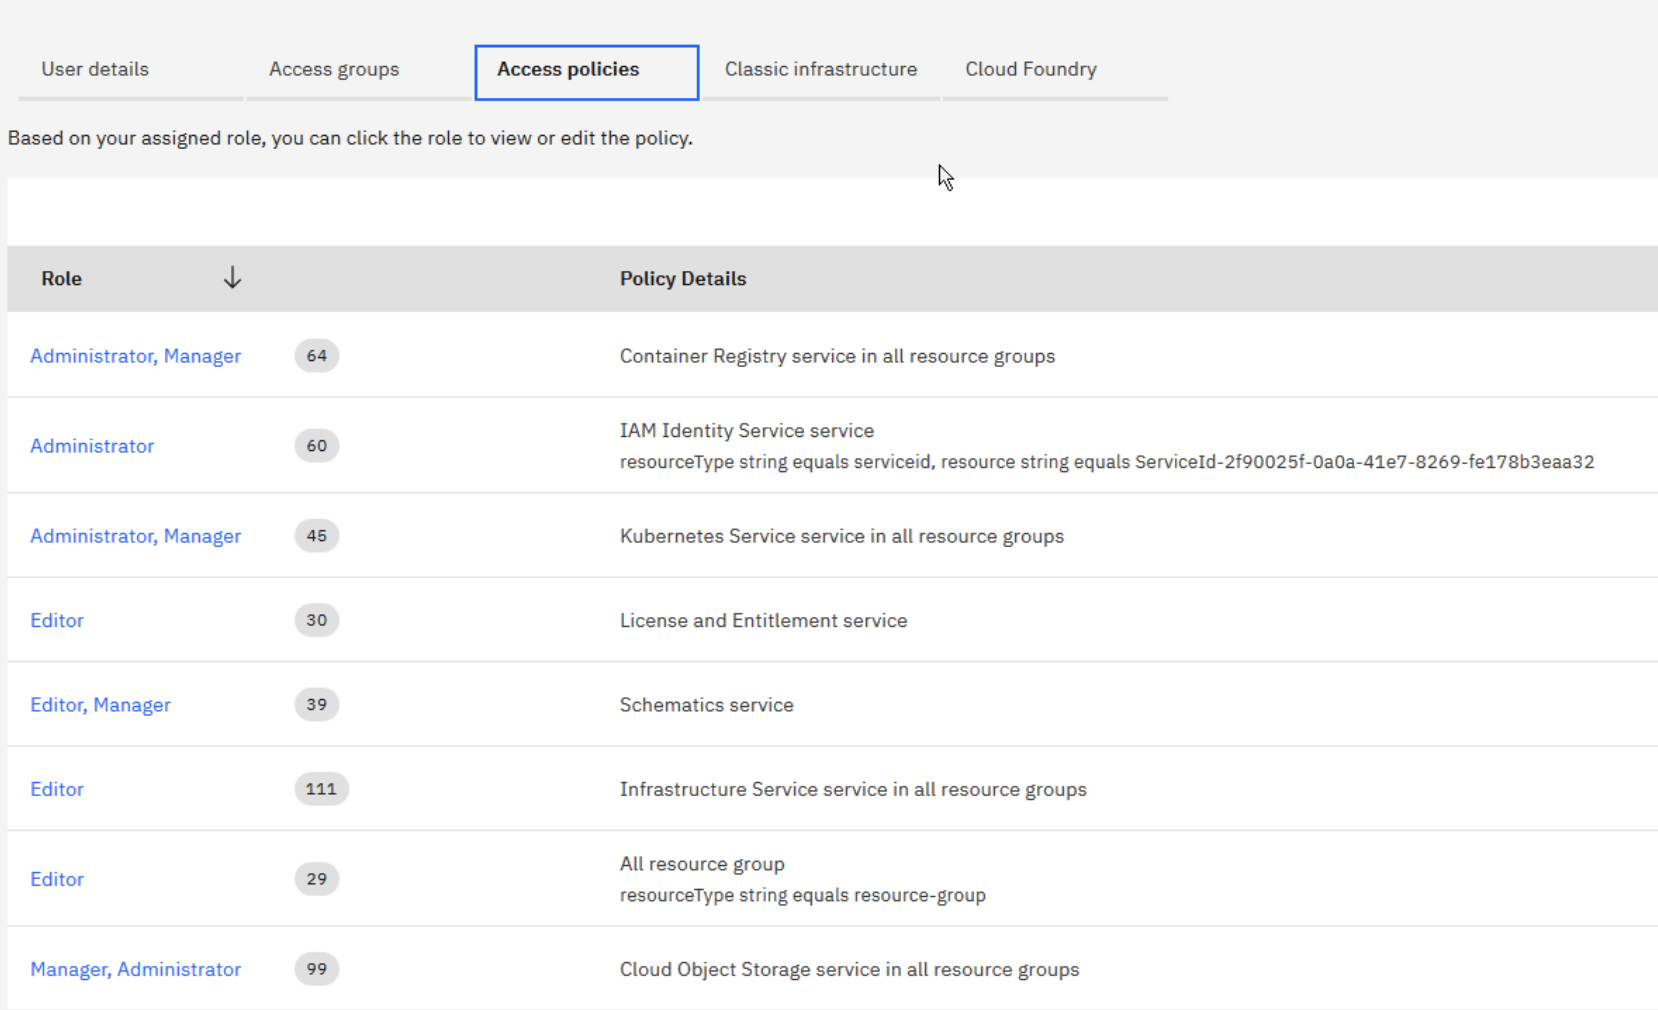
-
Depending on your infrastructure, allow time for the upload.
Step A. Setting up the Custom image for ManageIQ in IBM Cloud
Create a custom Linux-based image to deploy ManageIQ as a virtual server instance in IBM Cloud.
-
If you don’t already have an instance of IBM Cloud Object Storage, see Getting started with IBM Cloud Object Storage

You must also create a bucket in IBM Cloud Object Storage to store your images.
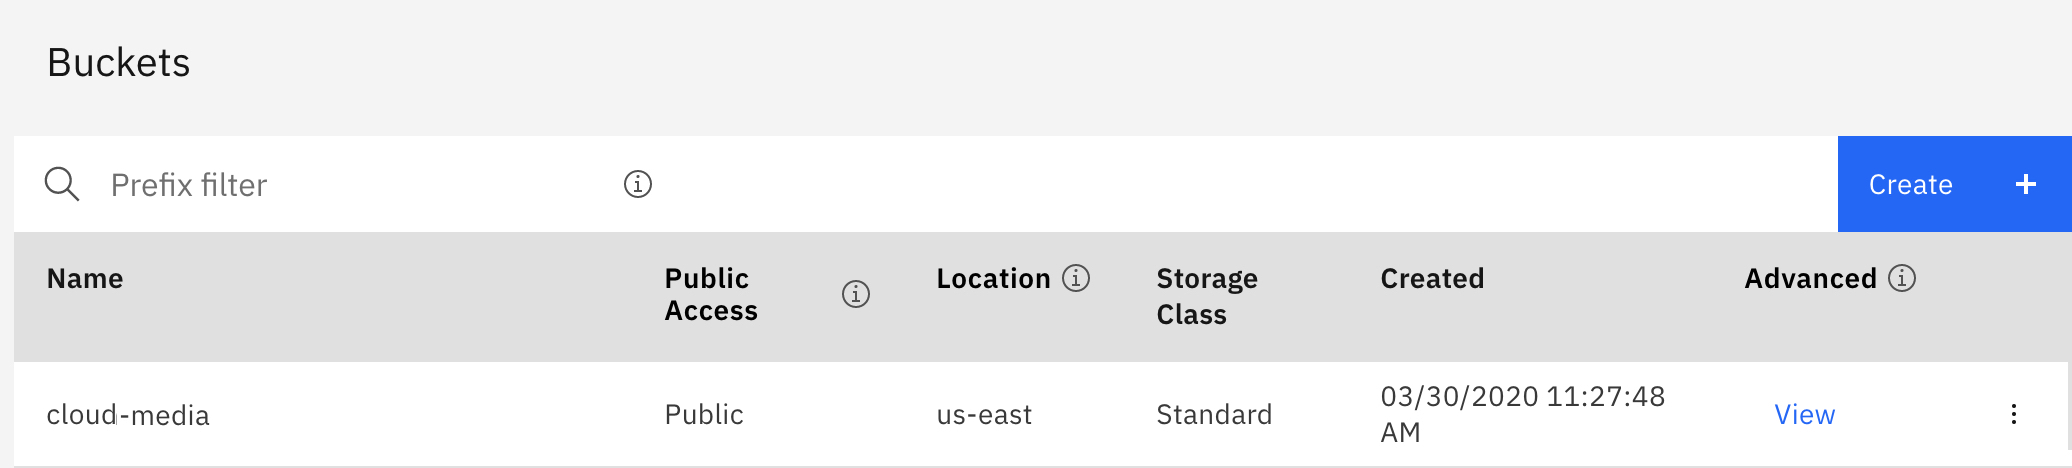
-
Upload the ManageIQ installation image (file name:
manageiq-openstack-jansa-1.qc2) to your IBM Cloud Object Storage. Select your bucket and click Add Objects to upload the images. For more information, see Uploading data by using the console.Note: You can use the Aspera high-speed transfer plug-in to upload images larger than 200 MB.

-
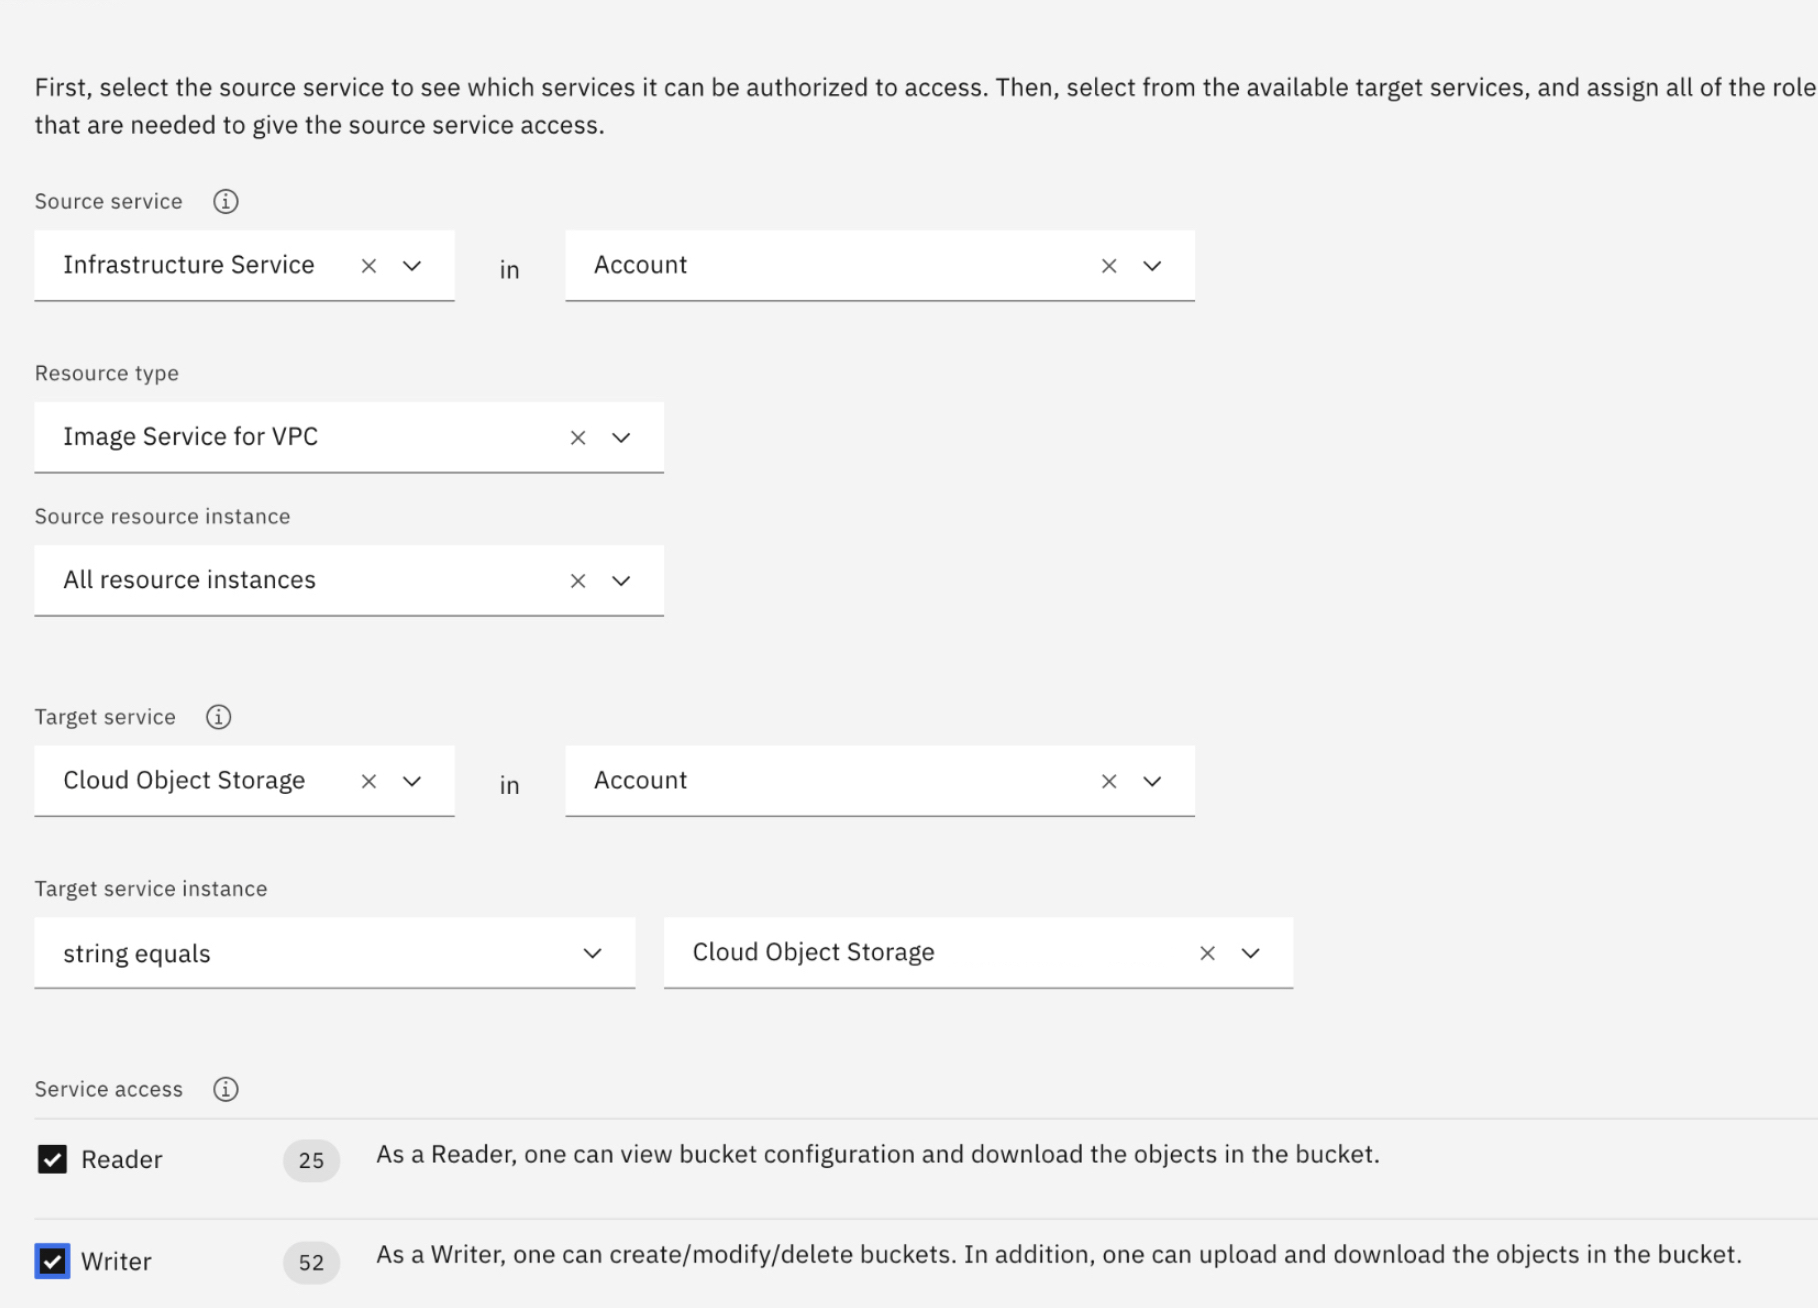
From IBM Cloud Identity and Access Management (IAM), create an authorization between the Virtual Private Cloud (VPC) Infrastructure (source service) > Image Service for VPC (resource type) and Cloud Object Storage (target service). For more information, see Create an authorization.
Important: The configuration must be set up as this example or permissions can fail.
-
Create a generation 2 Virtual Private Cloud (Must be generation 2). For more information, see Create a VPC
a. Create a VPC - The VPC must be in the same resource group and region as your bucket.
b. Create subnets in one or more zones. You can create subnets in suggested prefix ranges or in your own IP ranges that you bring to IBM Cloud.
c. Attach a public gateway if you want to allow all resources in a subnet to communicate with the public internet.
-
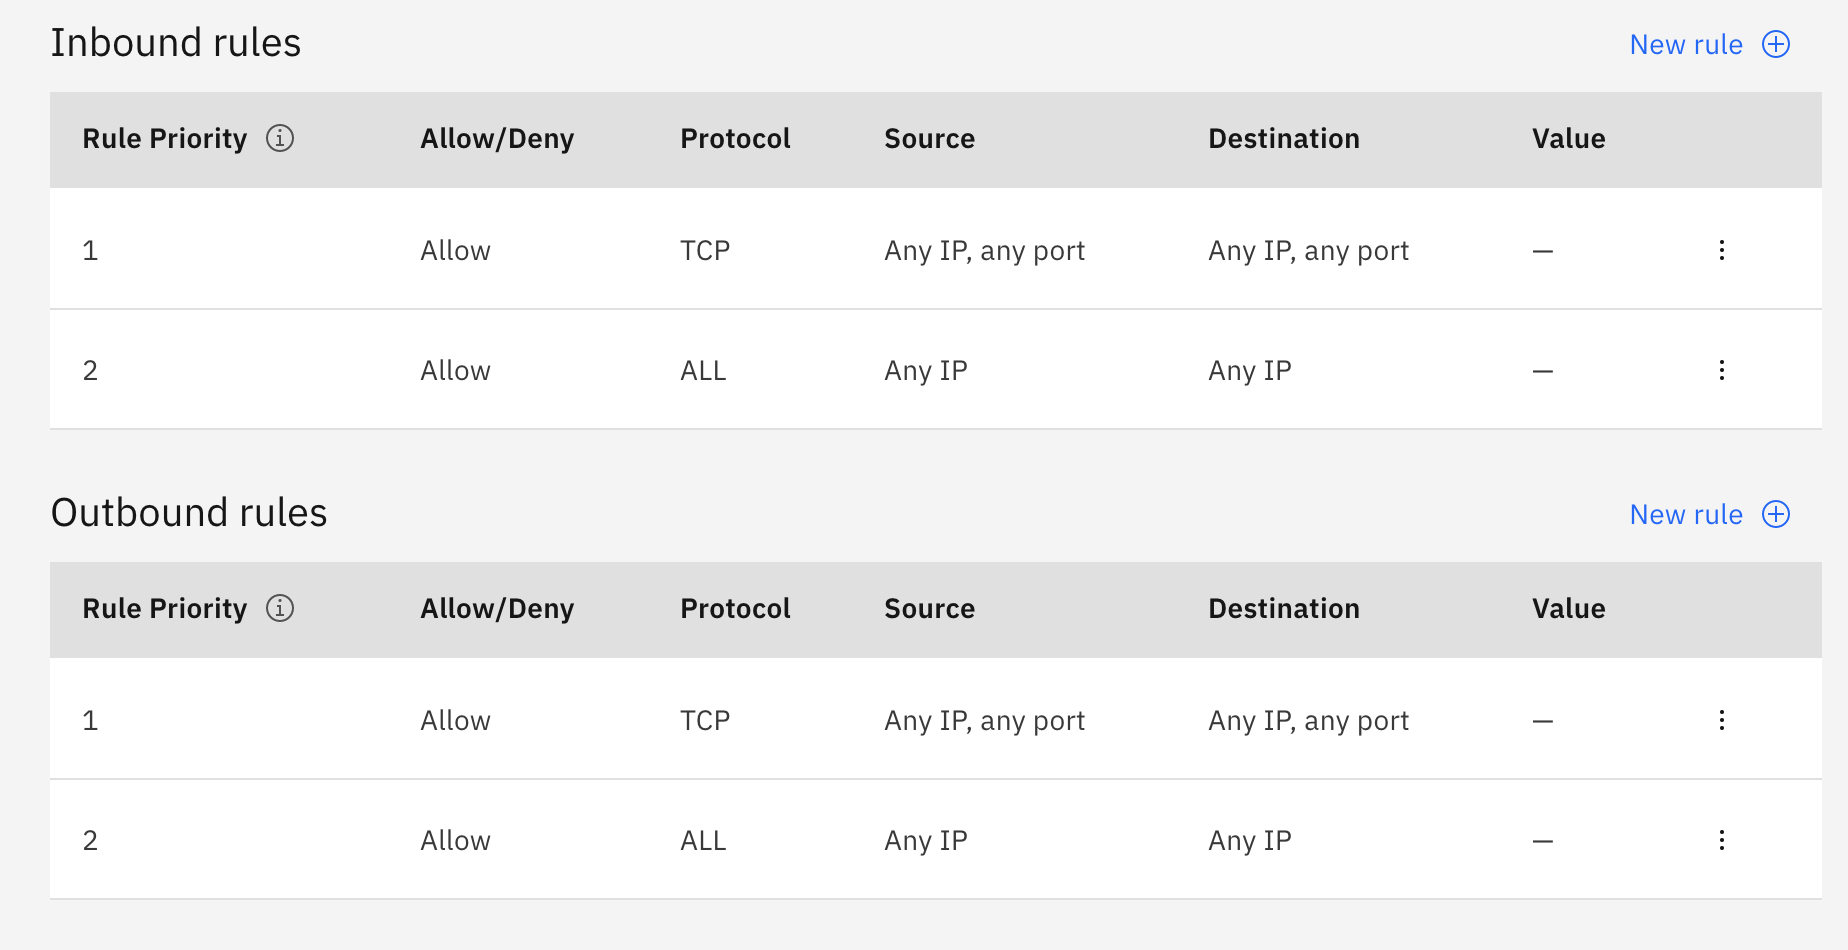
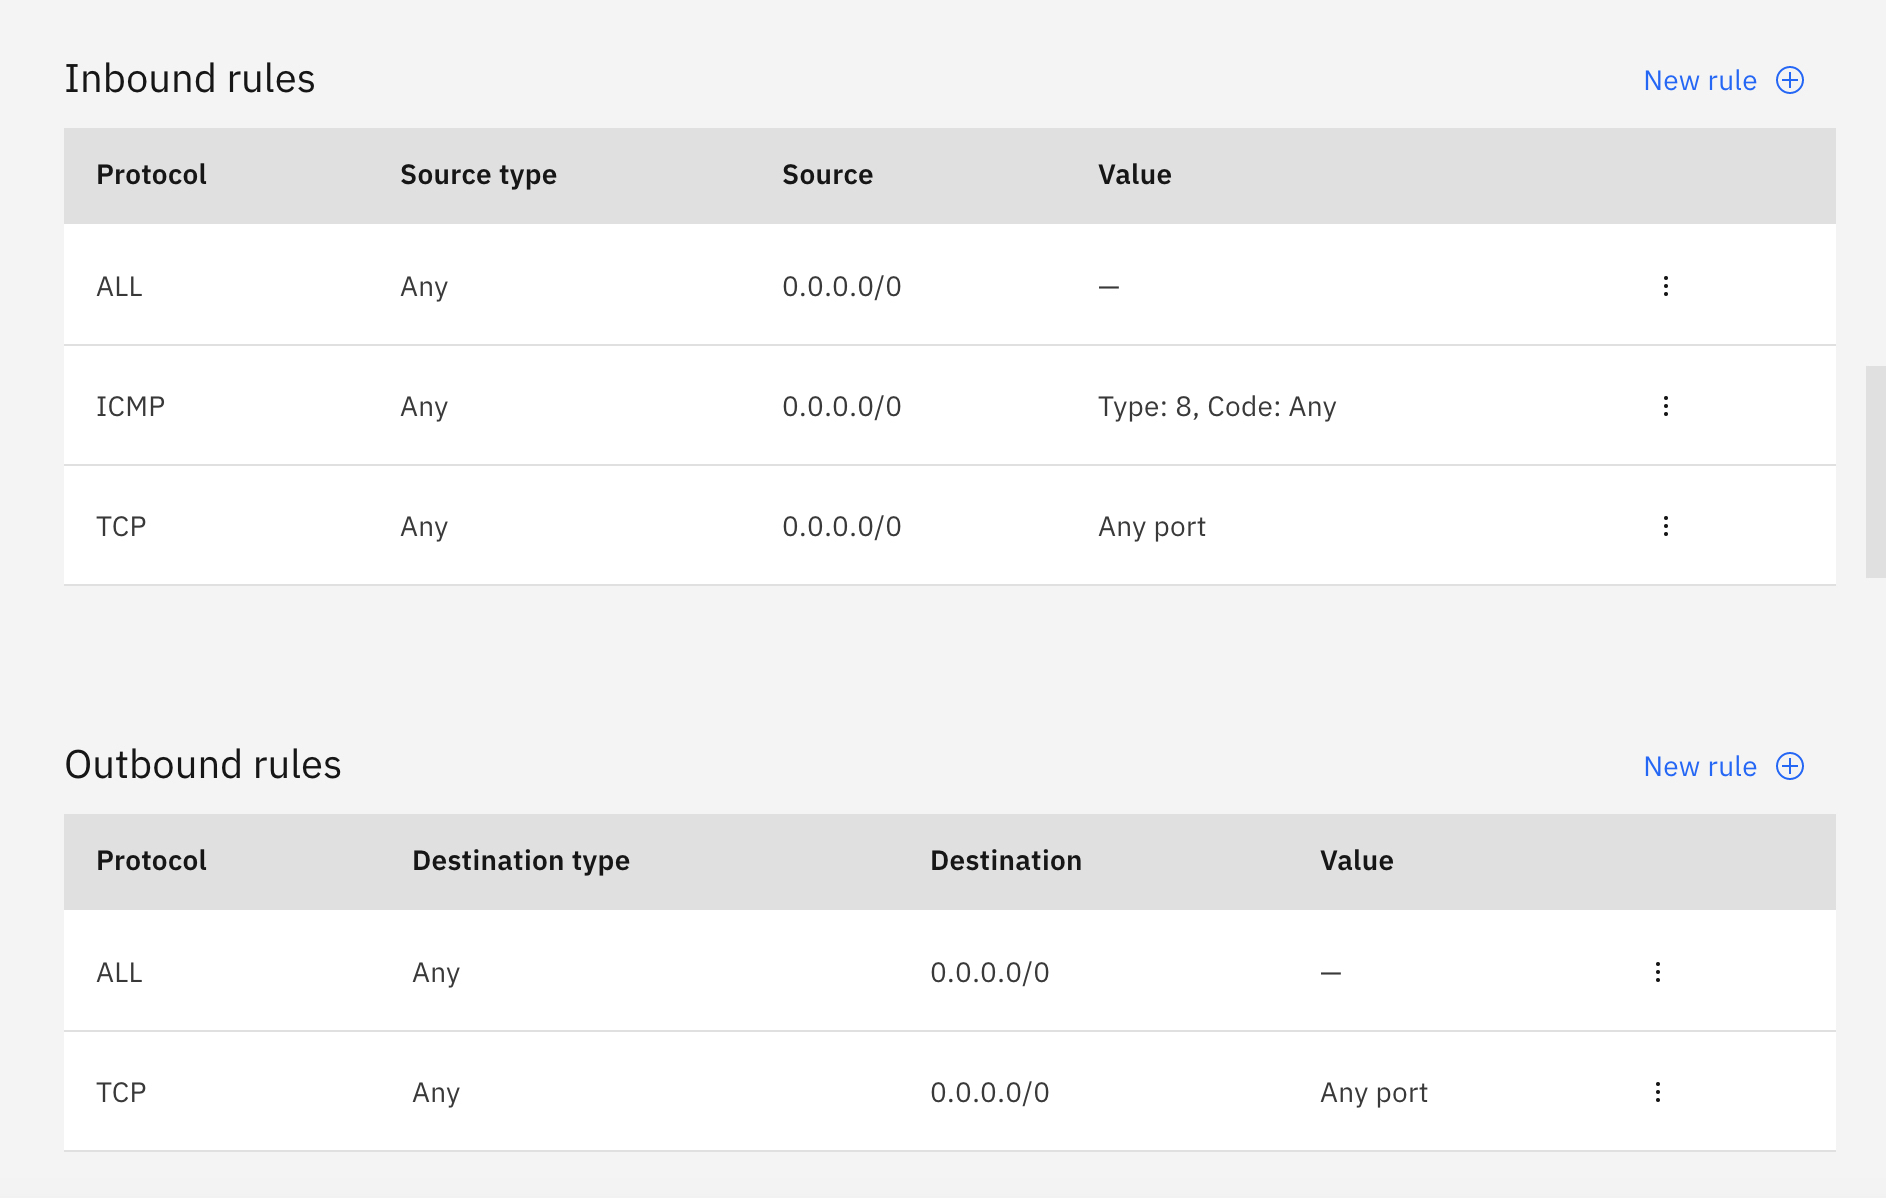
Configure an access control list (ACL) to limit the subnet’s inbound and outbound traffic.
-
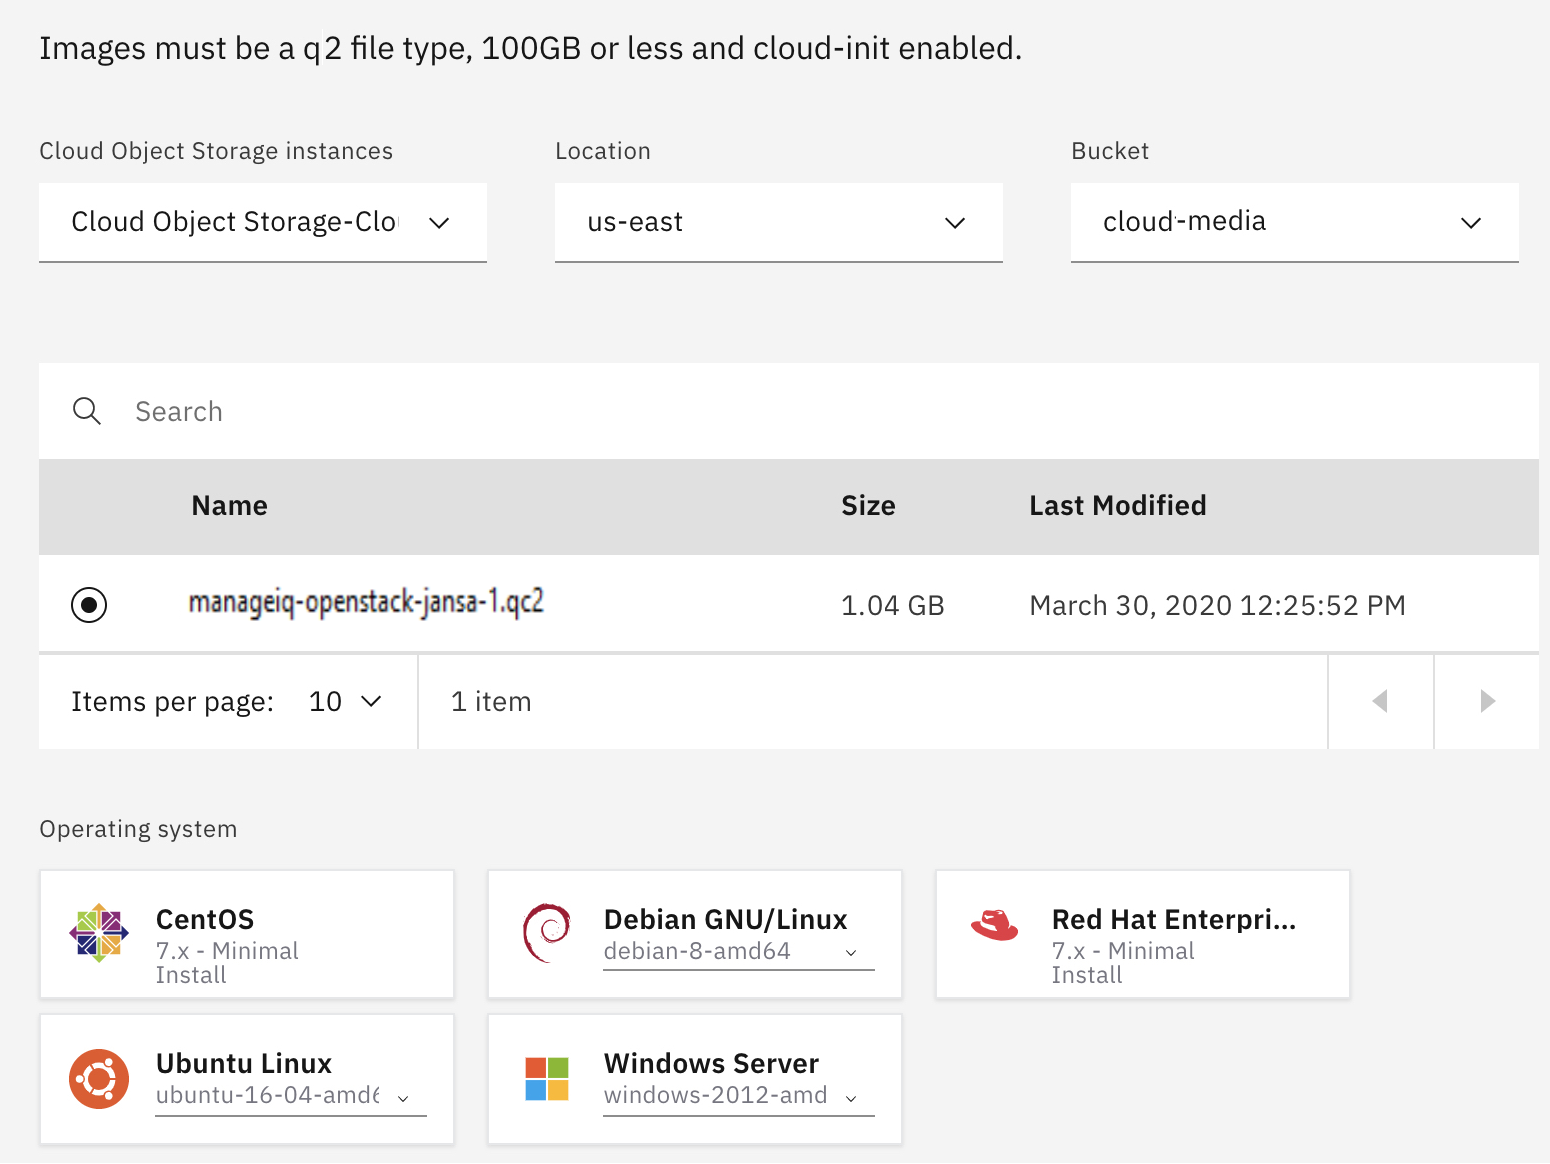
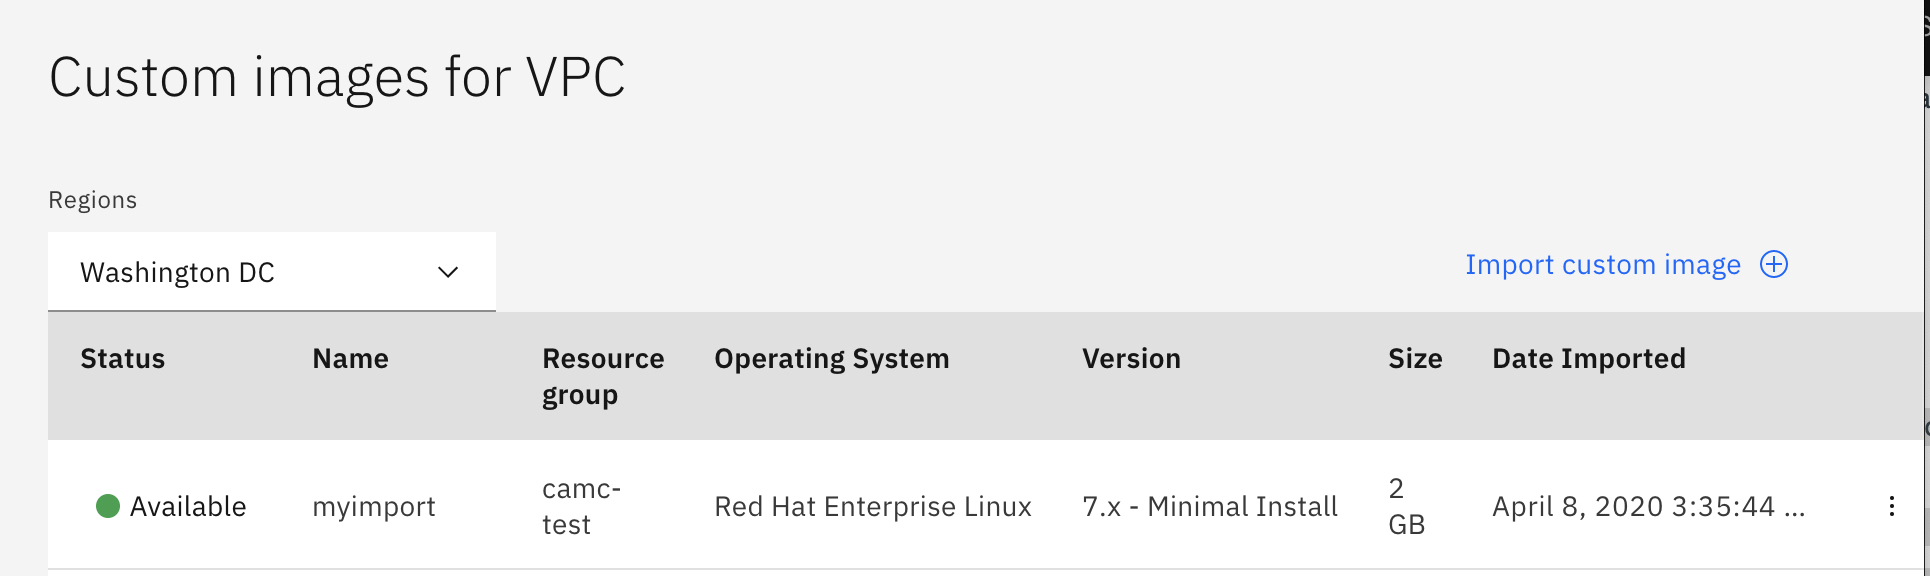
Import the ManageIQ installation images from the bucket into the VPC.
a. Browse to VPC Infrastructure > Compute > Custom images and select import custom image.
b. Enter a name.
c. Select a resource group.
d. Select the region.

e. Select your Cloud Object Storage and bucket based on your authorization that is created in step 3.
f. Select your qcow2 image (custom image).
g. Select the Red Hat Enterprise for Operating system.
h. Click Import custom image.
-
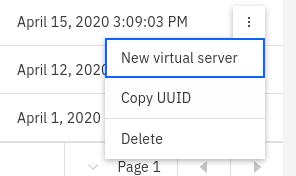
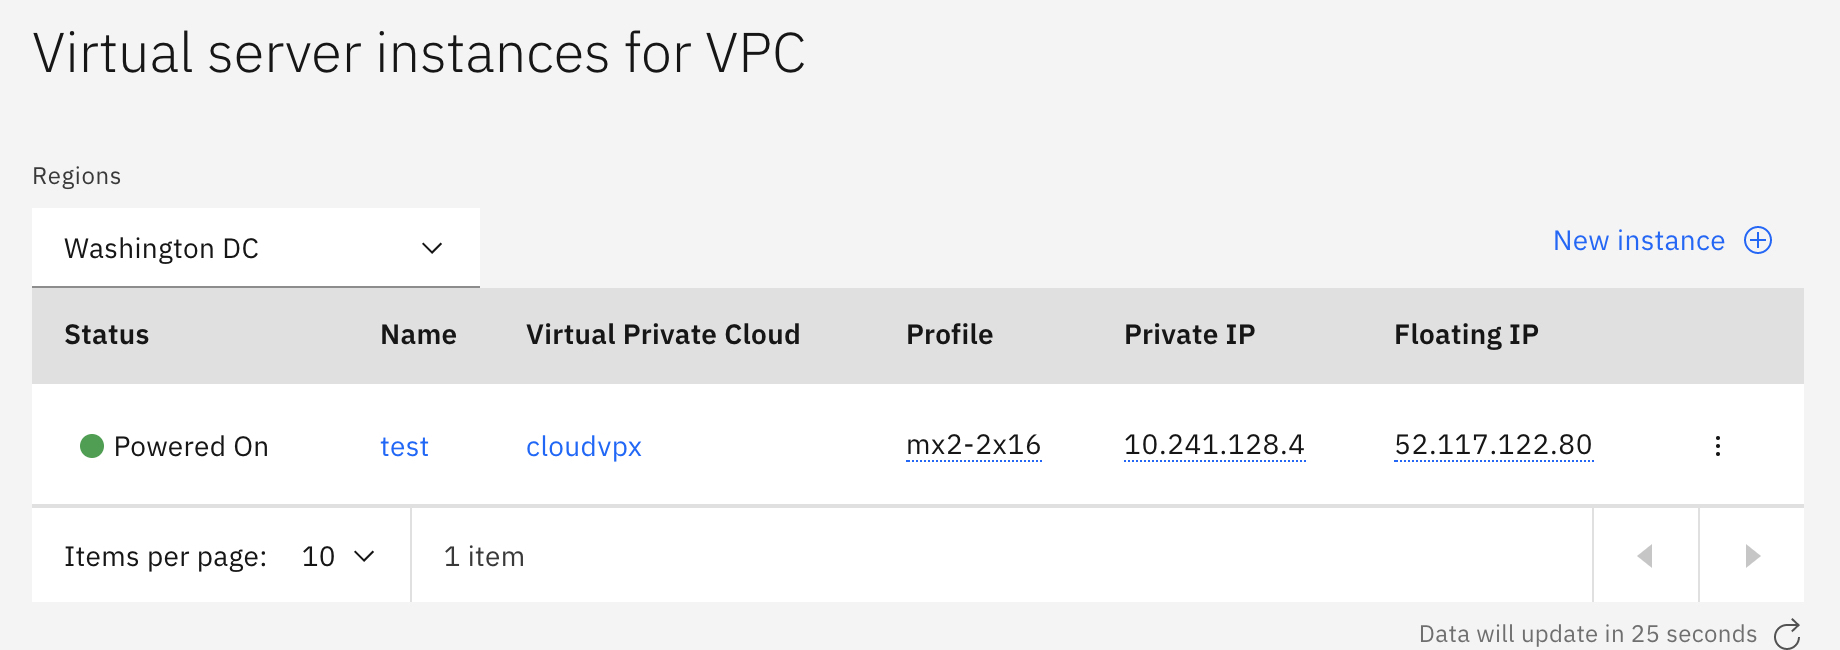
Create a virtual server from the custom image by clicking the “three dot menu” of that image, then selecting “New virtual server”.
a. Enter your name. Select the Virtual private cloud and Resource group.
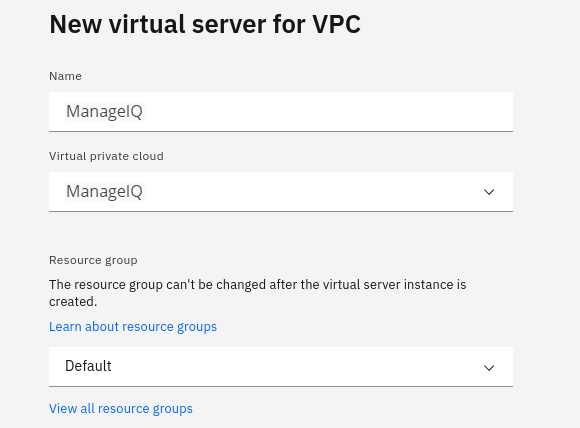
b. Select your region.
c. Select the custom image that you imported.
d. Use Memory Profile (2 vcpus, 16 gb ram, 4 gps).
e. Add an ssh key. You can use a public key. For more information, see: Locating or generating your SSH key.

f. Add storage to your virtual service. For example, 100 gigabytes. This volume is needed to configure the ManageIQ appliance.
Note: Make sure that the data volume name is unique and not named the same as another volume across your virtual server instances.

g. Select create virtual server instance.
-
Update the security group that allows inbound and outbound traffic. Open the server instance, go down to the Network interfaces section, and then modify the security group.
-
Assign the floating IP address:
Step B. Setting up the ManageIQ appliance
-
Use the
sshcommand to connect to your virtual server instance (appliance) by using the floating IP address. Log in with a username ofrootand the default passwordsmartvm. The Bash prompt for the root user is displayed.Example ssh as root user:
ssh root@<host_ip_address> -
Enter the
appliance_consolecommand. The ManageIQ appliance summary screen is displayed.
-
Press Enter to manually configure settings.
Note: Networking is already configured. You can skip this step.
-
Select 5) Configure database from the menu.
-
You are prompted to create or fetch an encryption key. If this instance is the first ManageIQ appliance, select 1) Create key.
-
If this is not the first ManageIQ appliance, select 2) Fetch key from remote system to fetch the key from the first appliance. For worker and multi-region setups, use this option to copy key from another appliance.
Note: All ManageIQ appliances in a multi-region deployment must use the same key.
-
-
Select 1) Create Internal Database for the database location.
-
Choose a disk for the database. The disk can be either a disk you attached previously, or a partition on the current disk.
Important: Best practice is using a separate disk for the database.
If an unpartitioned disk is attached to the virtual machine, the dialog shows the options. For example,
1) /dev/vdb: 20480 2) Don't partition the disk-
Enter 1 to choose /dev/vdb for the database location. This option creates a logical volume by using this device and mounts the volume to the appliance in a location appropriate for storing the database. The default location is /var/lib/pgsql, which can be found in the environment variable $APPLIANCE_PG_MOUNT_POINT.
-
Enter 2 to continue without partitioning the disk. A second prompt confirms this choice. Selecting this option results in using the root file system for the data directory (not advised in most cases).
-
- Enter N for “Should this appliance run as a stand-alone database server?”
- Select N to configure the appliance with the full administrative user interface.
-
When prompted, enter a unique number (01-99) to create a new region.
Important: Creating a new region deletes any existing data on the chosen database.
-
Create and confirm a password for the database.
ManageIQ configures the internal database. This takes a few minutes.
- Once ManageIQ is installed, you can log in and complete administrative tasks.
- Log in to Red Hat ManageIQ for the first time by:
- Select the URL for the login screen. For example,
https://xx.xx.xx.xxon the virtual server instance, wherexx.xx.xx.xxis the floating IP. -
Enter the default credentials (Username: admin Password: smartvm) for the initial login. - Click Login.